Quantcast
Channel: Tori Avey
Viewing all 80 articles
Browse latest View live

Gluten Free Potato Kugel Gratin

$
0
0
Tori’s Passover Potluck 2015 - Gluten Free Potato Kugel Gratin from Meg van der Kruik, Beard + Bonnet. Gluten Free, Dairy Free, Kosher for Passover. #PassoverPotluck

Tori’s Passover Potluck 2015 - Gluten Free Potato Kugel Gratin from Meg van der Kruik, Beard + Bonnet. Gluten Free, Dairy Free, Kosher for Passover. #PassoverPotluck

Tori Avey’s Passover Potluck is a unique annual online event. I’ve invited my friends, both Jewish and non-Jewish, to share recipes that are kosher for Passover. My goal is to foster mutual understanding between different cultures, to introduce you to my foodie friends, and to share yummy recipes and cooking ideas for Passover! To learn more about the Passover holiday, click here. For more Passover recipes, click here

Tori Avey's Passover Potluck - Sponsored by Time Tasted Natural Food Products

Passover Potluck 2015 is sponsored by Time Tasted.

I am thrilled to introduce you to my sweet friend Meg, the ultra-talented voice behind gluten free blog Beard & Bonnet. Meg’s recipes are creative, beautifully photographed and irresistible. She also rocks Instagram like a boss. I know you are going to adore Meg and her #PassoverPotluck recipe as much as I do!

-

Meg says:

Hi, Meg here from Beard & Bonnet! B&B is where I share my family’s favorite gluten free recipes, easy to follow tutorials, and the silly day to day stories from our life. I have 2 kids, a 13 year old and a 4 year old, as well as a super talented designer husband that always keeps me guessing. I can promise you that there is never a dull moment around our home or our site!

I am so honored to be here today on Tori’s site as a part of her annual Passover Potluck. I had the pleasure of sitting next to Tori, and eating her delicious Lentil Cauliflower Tacos, last year at a fun little bloggers gathering here in LA. It was such a great day and I feel so fortunate to have met her. She is every bit as genuine and kind in real life as you feel she is when you read her posts.

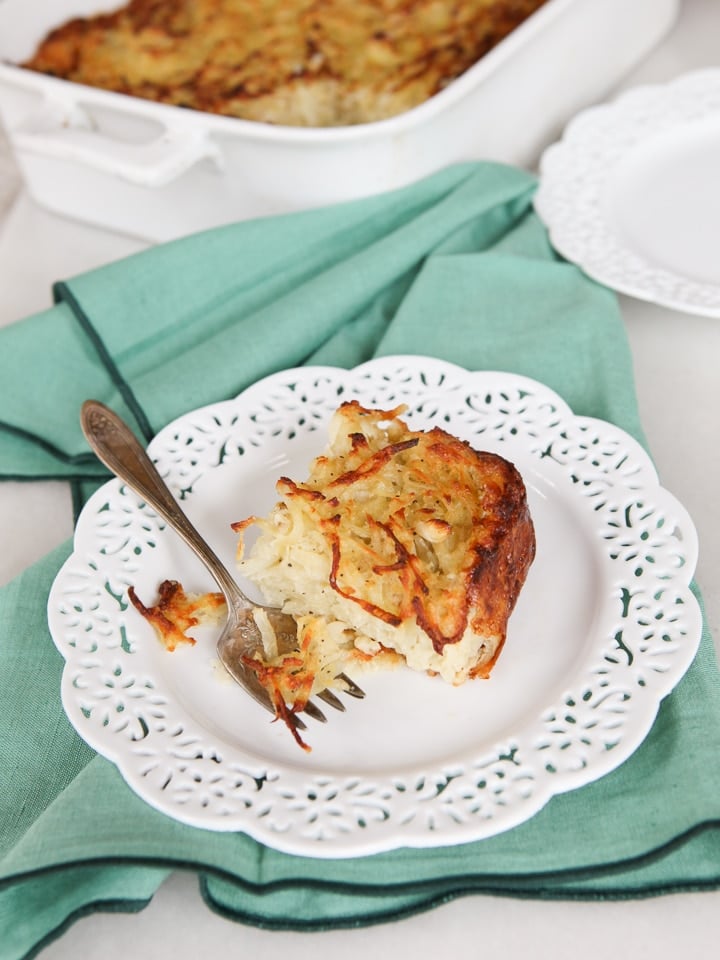
I have been waiting for what seems like forever to share this deliciousness! It was only within the last few weeks that I started working on this recipe, but when something is this tasty I just want to shout out the recipe from the rooftops. I have made this gluten free potato kugel gratin 3 times in the course of the last week; I have shared it with our friends, fed it to my family for all 3 meals in the day, and seriously considered making it a fourth time just so my house could smell that delectable aroma once again. Can someone please develop a potato kugel potpourri? I am not even kidding!

gluten free kugel 2

I announced a few months ago on Beard & Bonnet that I was going to start tracing my heritage and really learn where I come from. For most people starting a journey like this one is pretty easy, you simply ask your family questions about your ancestors and your heritage. Since I am adopted it is a bit more difficult. There are legal forms, court systems, and lots and lots of waiting! I decided in January that my first step was going to be to take an Ancestry DNA test and see what regions of the world my DNA can be traced back to. It took a little over 8 weeks, but when I received my results I was really excited to see that a percentage of my DNA can be traced back to Jewish decent. All together I have 9 ethnicity’s and cultures to explore that make up my own personal DNA and I fully intend to dig deep into each and every one of them! So, a big thanks to Tori for the jump start on this new project of mine.

As I perused through the recipe’s on Tori’s site for inspiration I was drawn to the page of kugels. There were so many kugels to choose from! I quickly realized that there are many kinds of kugels, ones with noodles, some with potatoes, savory ones, sweet ones, and even some overnight kugels. I also learned that during Passover due to Kosher laws, noodles cannot be used in recipes, so potato kugel it was!  Have I mentioned yet that this was the tastiest potato dish I have EVER made?

Tori’s Passover Potluck 2015 - Gluten Free Potato Kugel Gratin from Meg van der Kruik, Beard + Bonnet. Gluten Free, Dairy Free, Kosher for Passover. #PassoverPotluck

Although there are only 10 ingredients that make up my kugel this recipe is a bit of a time commitment. However the bulk of the time is spent in the oven baking into a beautiful dish that your entire family will love!  If you have a food processor with a slicing disk or a mandoline slicer the prep on this dish will go even faster.

For more Passover recipe ideas, check out the Pinterest boards below:

Passover – Ashkenazi

Passover – Sephardic

Passover – Gluten Free

Passover – Vegetarian

Recommended Products:

Mixing Bowls

Mandoline Slicer

2 1/2 Quart Baking Dish

Affiliate links help to support my website and the free recipe content I provide. A percentage of any purchase you make via these links will go towards buying ingredients, photography supplies and server space, as well as all the other expenses involved in running a large cooking website. Thank you very much for browsing!

Gluten Free Potato Kugel Gratin

Ingredients

  • 5-6 gluten free matzo crackers or 1 cup gluten free matzo meal
  • 1/2 cup extra-virgin olive oil
  • 3 1/2 lbs russet potatoes, peeled (about 6 large)
  • 9 oz thinly sliced shallots, (about 5 medium sized)
  • 1 1/2 tbsp minced fresh rosemary, plus an additional 1/2 tbsp, chopped for garnish
  • 1 1/2 tbsp minced fresh thyme, plus an additional 1/2 tbsp, chopped for garnish
  • 4 large eggs, at room temperature
  • 1 cup vegan "chicken" broth or regular chicken broth
  • kosher salt
  • fresh ground pepper
  • flaky sea salt, garnish

You will also need:

  • mixing bowls, mandoline slicer, food processor, 2 1/2 quart baking dish, pastry brush, baking sheet
Prep Time: 45 Minutes
Cook Time: 90 Minutes
Total Time: 2 Hours 30 Minutes
Servings: 8-10
Kosher Key: Pareve, Kosher for Passover
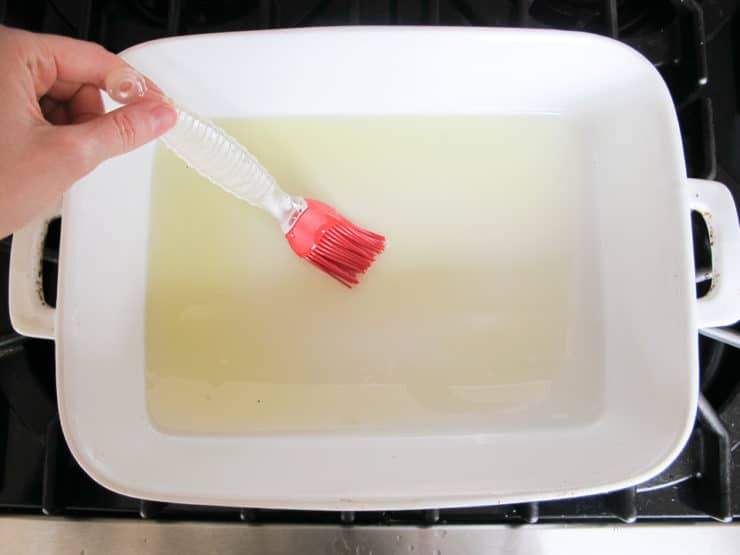
  • Preheat the oven to 425°F with a rack in the upper third. Combine 4 teaspoons Kosher salt and 1 teaspoon pepper in a small bowl. Lightly oil a 2 1/2 quart baking dish and sprinkle the bottom and sides with a teaspoon of the salt and pepper mixture. Set the pan and the remaining salt and pepper mixture aside. Place the matzo crackers in the bowl of a food processor and process until the crackers become a fine meal. Set aside.
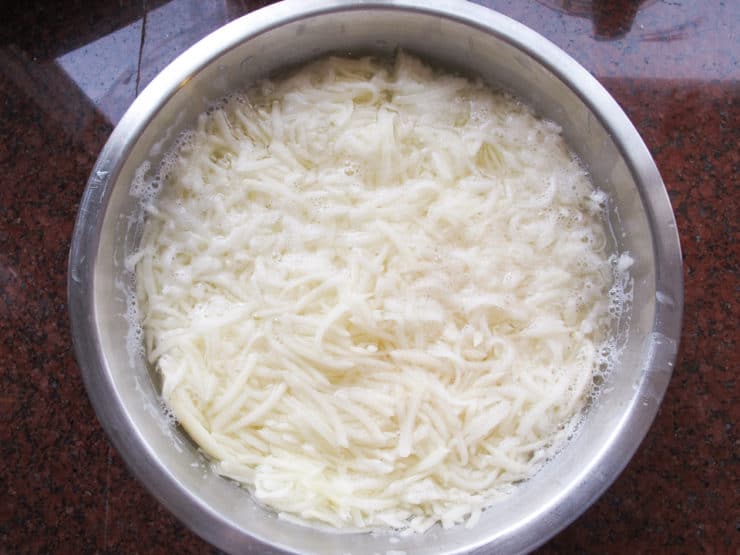
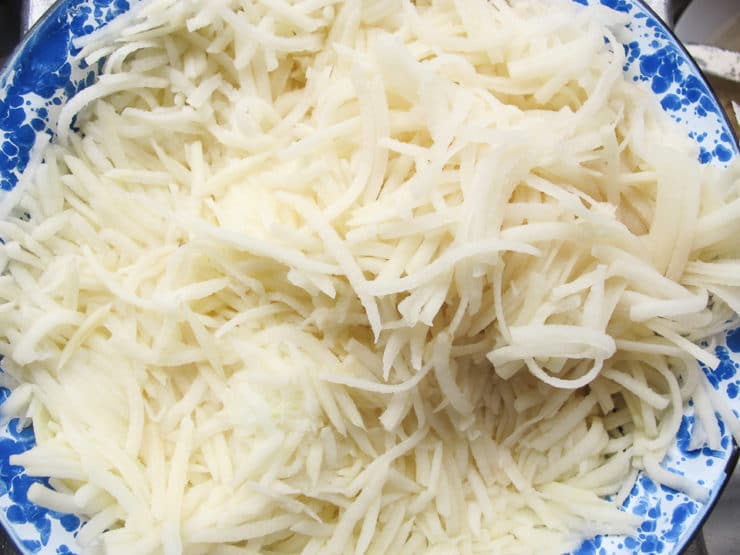
  • Using the food processor with a slicing disk set to 1/8-inch, or a mandoline, cut the potatoes into slices. Arrange the potatoes in stacks of 10 vertically in the baking dish. Alternating directions of the stacks of ten to create a basket weave pattern. Once all of the potatoes have been arranged wedge the thin slices of shallots in between the stacks of potatoes and sprinkle the rosemary and thyme over the top of the potatoes. Brush the potatoes with the olive oil and sprinkle with the remaining salt and pepper mixture. Place the pan on a rimmed baking sheet.
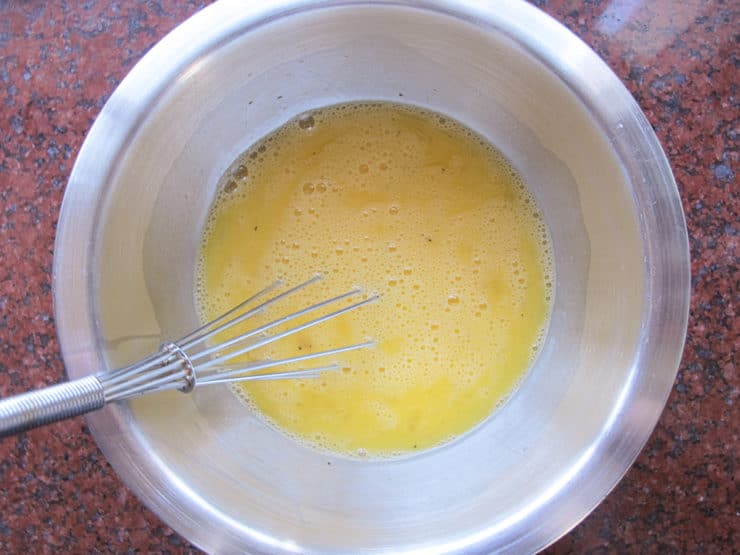
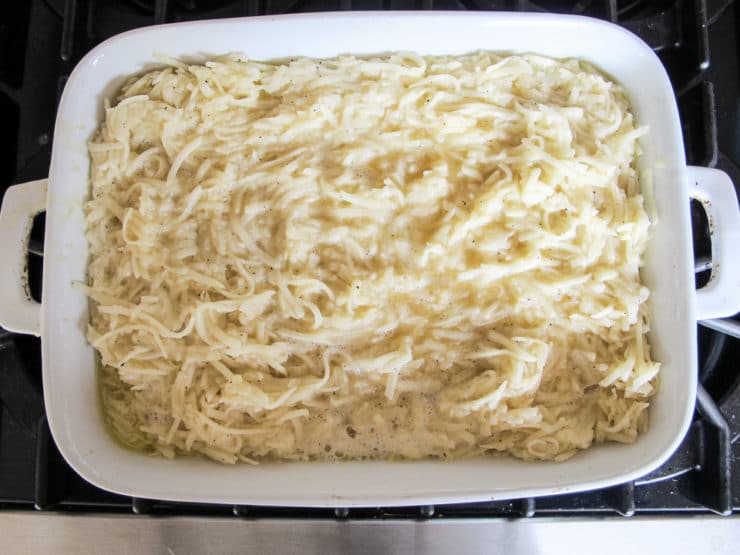
  • Tori’s Passover Potluck 2015 - Gluten Free Potato Kugel Gratin from Meg van der Kruik, Beard + Bonnet. Gluten Free, Dairy Free, Kosher for Passover. #PassoverPotluckWhisk together the eggs and broth in a medium sized bowl. Add the matzo meal and stir to combine. Pour the mixture evenly over the potatoes , tapping the baking sheet gently on the counter to ensure that the matzo mixture settles to the bottom of the dish.
  • Cover the baking dish with a sheet of parchment, then with foil, and transfer to the preheated oven. Bake for 45 minutes. Remove the foil and the parchment, rotate the pan and continue baking until the potatoes are tender when pierced with the tip of a pairing knife, about 40 minutes.
  • Garnish with the additional rosemary and thyme and sprinkle with flaky sea salt. Let rest for 15 - 20 minutes before serving.
  • Tori’s Passover Potluck 2015 - Gluten Free Potato Kugel Gratin from Meg van der Kruik, Beard + Bonnet. Gluten Free, Dairy Free, Kosher for Passover. #PassoverPotluck

Savory Slow Cooker Brisket

$
0
0
Savory Slow Cooker Brisket - Simple Brisket Recipe with Onion, Garlic and Spices Made in the Crock Pot. Easy, Tender, Delicious. Kosher for Passover

Savory Slow Cooker Brisket - Simple Brisket Recipe with Onion, Garlic and Spices Made in the Crock Pot. Easy, Tender, Delicious. Kosher for Passover

Savory Slow Cooker Brisket – Simple Brisket Recipe with Onion, Garlic and Spices Made in the Crock Pot. Easy, Tender, Delicious. Kosher for Passover

Note: This recipe has been updated from the archives. It is very similar to my original Slow Cooker Brisket recipe, but I have made some improvements through the years that I wanted to share with you. I’ve also updated the post with make-ahead instructions in case you want to make in advance. Enjoy!

Want to know one of my biggest prep secrets for big holiday meals? Two words – SLOW COOKER. Or CROCK POT, if you’re so inclined. With my stove and oven in overdrive, there is nothing better than having a brisket slowly cooking in the background while I deal with everything else. It frees up oven space, and the results are every bit as tender and delicious as brisket prepared in the oven. For larger Seder meals we’ve hosted, I’ve been known to have four slow cookers going at the same time, borrowed from family and friends! Nowadays when I host a big meal, I make a couple briskets ahead– the flavor improves when it’s allowed to sit in the refrigerator for a day or two before serving. It’s also easier to slice cold, and reheating is a breeze.

I’ve offered make-ahead directions below, as well as instructions for serving straight from the slow cooker. Either way, you will love this brisket… it is fork tender, flavorful, and juicy… everything a holiday brisket should be!

For more Passover recipe ideas, check out the Pinterest boards below:

Passover – Ashkenazi

Passover – Sephardic

Passover – Gluten Free

Passover – Vegetarian

Recommended Products:

Slow Cooker

Large Skillet

Immersion Blender

Affiliate links help to support my website and the free recipe content I provide. A percentage of any purchase you make via these links will go towards buying ingredients, photography supplies and server space, as well as all the other expenses involved in running a large cooking website. Thank you very much for browsing!

Savory Slow Cooker Brisket - Simple Brisket Recipe with Onion, Garlic and Spices Made in the Crock Pot. Easy, Tender, Delicious. Kosher for Passover

Savory Slow Cooker Brisket

Ingredients

  • 4-6 lb brisket
  • 10 garlic cloves, peeled
  • 3 onions, sliced
  • 3 bay leaves
  • 1/2 cup water
  • 2 tbsp olive oil
  • 1 1/2 tsp kosher salt
  • 1 tsp black pepper
  • 1 tsp paprika
  • 3/4 tsp turmeric
  • 1/4 tsp cayenne

You will also need

  • Slow cooker, large skillet, immersion blender
Total Time: 8 Hours
Servings: Serves 6-8
Kosher Key: Meat, Kosher for Passover
  • Place half of the chopped onions, 5 of the garlic cloves and the bay leaves in the bottom of the slow cooker.
  • Rinse the brisket and pat dry. Rub both sides of the meat with black pepper and salt.
  • Note about this next step-- if you're in a hurry you don't need to brown the brisket before placing it in the slow cooker, just mix the spices with the water and pour over the brisket in the slow cooker. However, if you do have time to brown it first the flavor will be much better! Drizzle 2 tbsp of olive oil into the pan and heat a large skillet over high heat until it just begins to smoke.
  • Brown the brisket on both sides—it will take a few minutes per side. A large brisket may overlap the edges of the skillet; you can brown it in stages, letting half the brisket overlap the edge, then adjusting it to brown the other half. Make sure you get some nice dark brown bits on there, it really adds to the flavor.
  • Once the brisket is browned, place it in the slow cooker on top of the onions and garlic.
  • Drain the fat from the skillet, leaving behind any brown bits in the skillet. Return the skillet to the stove. In a small bowl, mix together the water, salt, black pepper, paprika, turmeric and cayenne. Pour the water and spice mixture into the skillet and heat over medium until hot and bubbly, using the liquid to deglaze the pan and loosening brown bits gently from the bottom of the skillet with a spatula.
  • Pour the contents of the skillet over the brisket.
  • Top brisket with the remaining sliced onions and garlic cloves. Cover and cook on low for 8- 10 hours, or until fork tender. Tenderness will increase as it cooks, so take it out when it's tender to your liking. Most people like it very tender but not so soft that it is falling apart. You want it firm enough to slice but tender enough that the edges shred with a fork.
  • I recommend making this brisket ahead; allowing it to sit in the refrigerator for 1-2 nights will improve the flavor. If you would like to do this, skip ahead to where it says “Make Ahead Directions.” If you are not making ahead, continue reading.
  • Remove brisket from the pan and let it rest on the cutting board fat-side up for 20-30 minutes.
  • Meanwhile, skim fat from the surface of the cooking sauce.
  • You may strain the sauce to separate the solids out and discard— if you do this, return the sauce to the slow cooker, mix together 1 tbsp cornstarch with 1 tbsp of cold water, and stir it into the strained liquid in the slow cooker. Alternatively, you may thicken the cooking sauce by first removing the bay leaves, then using an immersion blender to blend the sauce with the garlic and onions directly in the slow cooker (careful, the liquid is hot-- protect yourself with a towel and take care with more delicate ceramic slow cooker inserts).
  • Once your sauce is ready, cut fat cap off the brisket.
  • Then cut the brisket in thin slices against the grain.
  • Return slices to the slow cooker and cover with sauce. Heat the meat slices on high setting in the sauce for 30-60 minutes more until sauce is hot, bubbly and thickened around the meat. Serve sliced brisket hot with sauce.
  • Make Ahead Directions: Switch the brisket and sauce to a ceramic or glass dish. Skim fat from the surface of the cooking sauce. You may strain the sauce to separate the solids out and discard. Alternatively, you may thicken the cooking sauce by first removing the bay leaves, then using an immersion blender to blend the sauce with the garlic and onions directly in the slow cooker (careful, the liquid is hot-- protect yourself with a towel and take care with more delicate ceramic slow cooker inserts). Pour sauce over the meat in the dish. Cover with plastic wrap and place in the refrigerator. Let the brisket chill overnight, or up to two days. You can also freeze the brisket up to a week ahead if you prefer. 2 hours before serving, remove the brisket from the refrigerator. The fat in the sauce will have risen to the top, turned white, and solidified. Use a spoon to scoop the fat bits out of the sauce and discard. Take the brisket out of the dish and brush any excess sauce back into the dish. Place brisket on a cutting board, fat-side up. Slice the meat cold—first cut the fat cap off the brisket, then cut the brisket in thin slices against the grain. Pour sauce into the slow cooker and set to high heat. If you strained the sauce and didn’t blend it, mix together 1 tbsp cornstarch (use potato starch for Passover) with 1 tbsp of cold water, and stir it into the strained liquid in the slow cooker. Place brisket slices into the slow cooker, cover with sauce, and reheat for 45-75 minutes or until hot and bubbly. Serve warm.
  • Savory Slow Cooker Brisket - Simple Brisket Recipe with Onion, Garlic and Spices Made in the Crock Pot. Easy, Tender, Delicious. Kosher for Passover

Fried Chicken Sliders

$
0
0
Fried Chicken Sliders Recipe - Crispy, Flavorful Fried Chicken Thighs on Freshly Baked Biscuits with Pickle Slices and a Drizzle of Honey. #southern #comfortfood

Fried Chicken Sliders Recipe - Crispy, Flavorful Fried Chicken Thighs on Freshly Baked Biscuits with Pickle Slices and a Drizzle of Honey. #southern #comfortfood

Fried Chicken Sliders Recipe – Crispy, Flavorful Fried Chicken Thighs on Freshly Baked Biscuits with Pickle Slices and a Drizzle of Honey. #southern #comfortfood

Versions of fried chicken existed long before the southern United States coined it as their own. From Italian pollo fritto to Vietnamese ga xao, cultures throughout the world have regional variations on this crispy, fried dish. It rose to popularity in America during the early 1800s, when African slaves did most of the cooking in Southern homes. Chicken was more expensive than other meats and was considered a treat in the African American community. Early on it was served as a fricassee – fried and braised in sauce. Frying without sauce became the method of choice during the Civil War. Cooking chicken this way made it less prone to spoilage, which meant that women could send it to soldiers fighting in the battlefield.

Fried Chicken Sliders Recipe - Crispy, Flavorful Fried Chicken Thighs on Freshly Baked Biscuits with Pickle Slices and a Drizzle of Honey. #southern #comfortfood

In her 1881 cookbook What Mrs. Fisher Knows About Old Southern Cooking, African American cook Abby Fisher shared an early American recipe for fried chicken. Her version involves flour, fat, and a finishing of thin gravy:

Fried Chicken

Cut the chicken up, separating every joint, and wash clean. Salt and pepper it, and roll into flour well. Have your fat very hot, and drop the pieces into it, and let them cook brown. The chicken is done when the fork passes easily into it. After the chicken is all cooked, leave a little of the hot fat in the skillet, then take a tablespoon of dry flour and brown it in t he fat, stirring it around, then pour water in and stir till the gravy is as thin as soup.

With the advent of the automobile, roadside diners and restaurants began appearing in droves, and fried chicken was on most menus. In the 1940s Harlan Sanders, better known as Colonel Sanders, developed his signature fried chicken recipe. By 1952, his popular Kentucky Fried Chicken franchise helped to make fried chicken a common treat in households across the country. Today, fried chicken is considered a quintessential dish in American Southern cuisine.

A few months ago my family and I ate at Yardbird Restaurant in Miami Beach, Florida. They served a mouthwatering Fried Chicken Slider appetizer that we absolutely loved. When I got home I whipped up my own version. I added thin dill pickle slices and a drizzle of honey to complement the salty, spicy, savory flavor. These irresistible Fried Chicken Sliders on buttery fresh-baked biscuits are the perfect portable bite, just right for a road trip through the American South. Try them with a mug of Blackberry Vanilla Bourbon Lemonade for the ultimate Southern lunch.

Fried Chicken Sliders Recipe - Crispy, Flavorful Fried Chicken Thighs on Freshly Baked Biscuits with Pickle Slices and a Drizzle of Honey. #southern #comfortfood

Fried Chicken Sliders

Biscuit Ingredients

  • 2 cups all purpose flour
  • 1 tbsp baking powder
  • 1/4 tsp baking soda
  • 1 1/2 tsp sugar
  • 1/2 tsp salt
  • 6 tbsp salted butter, salted margarine OR buttery flavored shortening, frozen (use margarine or shortening for kosher)
  • 1 cup milk OR unsweetened non-dairy milk (use non-dairy milk for kosher - almond, cashew and soy milk work well)
  • 2 tbsp freshly squeezed lemon juice
  • 2 tbsp additional salted butter OR margarine (use margarine for kosher)

Fried Chicken Ingredients

  • 1 lb. boneless skinless chicken thighs (4 thighs)
  • 1 cup self rising flour
  • 1/2 tsp black pepper
  • 2 eggs
  • 1/3 cup hot sauce
  • 2 tbsp water
  • garlic powder
  • 3 pints peanut oil
  • Pickle slices and honey, for topping

You will also need

  • Baking sheet, sifter, pastry cutter, large pot, candy thermometer
Total Time: 45 Minutes
Servings: 8 servings
Kosher Key: Meat (use non-dairy ingredients for biscuits)

To Make Biscuits:

  • For buttery biscuits, use butter and milk. For dairy-free biscuits (kosher for serving with meat), use margarine or shortening and dairy-free milk in the biscuit dough, then brush with margarine.
  • Preheat oven to 450 degrees F. Sift together flour, baking powder, baking soda, sugar and salt in a large bowl. If you have extra time, chill dry ingredients in the refrigerator for 20 minutes before proceeding. If not, that's ok-- cold dry ingredients provide a better result, but they are not a requirement here (although you should make sure that the butter or shortening is chilled or frozen before proceeding).
  • Fried Chicken Sliders Recipe - Crispy, Flavorful Fried Chicken Thighs on Freshly Baked Biscuits with Pickle Slices and a Drizzle of Honey. #southern #comfortfoodAdd frozen butter, margarine or shortening to the bowl cut into small pieces. Use a pastry cutter or fork to combine the dry ingredients with the fat until only small pieces remain and it looks like sand.
  • Fried Chicken Sliders Recipe - Crispy, Flavorful Fried Chicken Thighs on Freshly Baked Biscuits with Pickle Slices and a Drizzle of Honey. #southern #comfortfoodIn a separate bowl whisk together milk or non-dairy milk with lemon juice.
  • Fried Chicken Sliders Recipe - Crispy, Flavorful Fried Chicken Thighs on Freshly Baked Biscuits with Pickle Slices and a Drizzle of Honey. #southern #comfortfoodMake a well in the dry ingredients. Stir gently while pouring in the milk mixture 1/3 cup at a time. You may not need all of the liquid. Stir until just slightly combined, the mixture will be sticky.
  • Fried Chicken Sliders Recipe - Crispy, Flavorful Fried Chicken Thighs on Freshly Baked Biscuits with Pickle Slices and a Drizzle of Honey. #southern #comfortfoodTurn onto a lightly floured surface, dust the top with a bit of flour and then fold the dough over on itself 4-5 times. Resist the urge to knead the dough, it will result in dense biscuits. Form into a 1-inch thick disc, handling as little as possible. Use a 2-inch biscuit or cookie cutter and push straight down through the dough, then slightly twist to cut out as many biscuits as possible.
  • Fried Chicken Sliders Recipe - Crispy, Flavorful Fried Chicken Thighs on Freshly Baked Biscuits with Pickle Slices and a Drizzle of Honey. #southern #comfortfoodPlace biscuits on a greased baking sheet in two rows, making sure they just touch along the edges. This will help them rise uniformly. Gently reform the remaining dough and cut out one or two more biscuits. You should end up with 8 biscuits total. Gently press a small divot in the center of each biscuit with your thumb. Brush biscuits with the 2 T. melted butter or margarine. Bake in the 450 degree oven for 20 minutes or until fluffy and golden, rotating the pan halfway through baking. Best if eaten while still hot, fresh from the oven.
  • Fried Chicken Sliders Recipe - Crispy, Flavorful Fried Chicken Thighs on Freshly Baked Biscuits with Pickle Slices and a Drizzle of Honey. #southern #comfortfood

To Make Fried Chicken Thighs:

  • In a medium bowl, beat the eggs, water, and hot sauce together. Reserve.
  • Fried Chicken Sliders Recipe - Crispy, Flavorful Fried Chicken Thighs on Freshly Baked Biscuits with Pickle Slices and a Drizzle of Honey. #southern #comfortfoodIn another medium bowl, combine the self-rising flour and black pepper.
  • Fried Chicken Sliders Recipe - Crispy, Flavorful Fried Chicken Thighs on Freshly Baked Biscuits with Pickle Slices and a Drizzle of Honey. #southern #comfortfoodTrim excess fat from thighs and split in half. Sprinkle chicken pieces generously with salt, then lightly sprinkle with garlic powder.
  • Fried Chicken Sliders Recipe - Crispy, Flavorful Fried Chicken Thighs on Freshly Baked Biscuits with Pickle Slices and a Drizzle of Honey. #southern #comfortfoodDip seasoned chicken in hot sauce mixture, then coat with seasoned flour. Pour oil in a large sauce pot and heat to 350 using a candy thermometer. Carefully submerge the chicken pieces into the hot oil. The oil temp will begin to decrease so you'll need to increase the heat to keep it at a steady 350 degree temp. Fry the chicken until crispy and cooked through (it should begin to float). This will take 4-5 minutes.
  • Fried Chicken Sliders Recipe - Crispy, Flavorful Fried Chicken Thighs on Freshly Baked Biscuits with Pickle Slices and a Drizzle of Honey. #southern #comfortfoodServe hot fried chicken thighs on fresh split biscuits. Top with pickle slices and drizzle with honey.
  • Fried Chicken Sliders Recipe - Crispy, Flavorful Fried Chicken Thighs on Freshly Baked Biscuits with Pickle Slices and a Drizzle of Honey. #southern #comfortfood

Other Great Recipe Ideas

In Jennie’s Kitchen: Pickled Jalapeno Watermelon Rind

Recipe Girl: Strawberry Brown Butter Shortcake

Research Sources:

Edge, John T. (2004). Fried Chicken: An American Story. G. P. Putnam’s Sons, New York, NY.

McDaniel, Rick. An Irresistible History of Southern Food: Four Centuries of Black-eyed Peas, Collard Greens & Whole Hog Barbecue. Charleston, SC: History, 2011.

Lemon Basil Grilled Chicken Breasts

$
0
0
Lemon Basil Grilled Chicken Breast - Simple, Delicious Summery Marinade Recipe for Chicken. Broil, Bake, Grill or Sauté.

Lemon Basil Grilled Chicken Breasts - Simple, Delicious Summery Marinade Recipe for Chicken. Broil, Bake, Grill or Sauté.

Lemon Basil Grilled Chicken Breasts – Simple, Delicious Summery Marinade Recipe for Chicken. Broil, Bake, Grill or Sauté.

The past few months have been pretty busy for me. Behind the scenes of this blog there are a lot of projects “cooking,” some of which have nothing to do with food! To fuel my system and deal with this crazy schedule I’ve developed some easy, healthy recipes that can be made at a moment’s notice. I mean, we all love babka and rugelach, but these types of treats are super time consuming. I thought you all would appreciate some simpler recipes that you can make for a weeknight dinner… or, in this case, a Memorial Day barbecue!

These easy Lemon Basil Grilled Chicken Breasts are packed with flavor. While most days I eat vegetarian, I’ve always said that I’m more of a “flextarian” and lately I’ve been incorporating lean, organic meats into my diet. I wanted to develop a bright and flavorful chicken marinade to reflect the warm days ahead and the combination of lemon and basil turned out to be exactly what I was looking for. Try this chicken breast on sandwiches, salads or alongside your favorite side dish. I like to grill a few of them, then pull them out as needed for salads, sandwiches, or wraps. A quick smoky grill adds an extra boost of flavor to this tasty marinated chicken.

The history of grilling stretches back to caveman days, when a brilliant ancestor of ours discovered that holding meat directly over an open flame for an extended period of time “cooked” the meat. Most likely, cavemen stumbled upon animals that had been killed in forest fires. After scavenging the meat, they found it easier to digest than the raw stuff (I’m sure the improved flavor was also a plus!). it’s impossible to pinpoint exactly where this cooking method was first used. Anthropologists have never come to a consensus on when our earliest ancestors first learned to “cook” and prepare food. Current estimates place the advent of cooking anywhere between 2 million and 300,000 years ago—a pretty wide range. So on the grilling front, the best I can do is thank Mister Caveman or Miss Cavewoman for his or her remarkable contribution to our cooking heritage.

You can read more about the history of grilling (and barbecue!) here.

Recommended Products:

Grill

Affiliate links help to support my website and the free recipe content I provide. A percentage of any purchase you make via these links will go towards buying ingredients, photography supplies and server space, as well as all the other expenses involved in running a large cooking website. Thank you very much for browsing!

 Beauty shots and styling by Bethany Nauert.

Lemon Basil Grilled Chicken Breasts - Simple, Delicious Summery Marinade Recipe for Chicken. Broil, Bake, Grill or Sauté.

Lemon Basil Grilled Chicken Breasts

Ingredients

  • 2 lbs boneless, skinless chicken breast, rinsed and trimmed of fat, 4 breasts
  • 1/4 cup extra virgin olive oil
  • 1 lemon, zested and juiced
  • 1/2 cup basil, roughly chopped
  • 2 tsp honey or agave
  • 2 tsp salt
  • 1/2 tsp black pepper

You will also need

  • Large resealable plastic bag, grill
Total Time: 4 Hours 30 Minutes
Servings: 4
Kosher Key: Meat
  • Rinse your chicken breasts and trim off any fat.
  • Combine all ingredients, except for the chicken, in a large, resealable plastic bag. Close the bag and use your hands to work the ingredients together. Open the bag and add the chicken breast. Remove as much air from the bag as possible before re-sealing. Massage chicken with marinade until it appears to be well covered.
  • Marinate chicken in the refrigerator for 4 hours, or overnight. Overnight is preferred. Use within 2 days. The chicken can also be frozen for up to 6 weeks.
  • When ready to cook, remove chicken from the bag, remove any large chunks of basil or lemon zest that sticks to the chicken. If cooking from frozen, allow the chicken to thaw in the fridge overnight.
  • Preheat grill on high heat, do not start with a cold grill or the chicken will stick. Once hot, place the chicken on the grill and cook for 2 minutes. You should be able to easily lift the chicken breast and see dark grill marks. If the chicken sticks to the grill, give it an extra 30 seconds and try again.
  • Reduce heat to medium and flip the chicken, cook for an additional 8 to 10 minutes, until the juices run clear or the thickest part of the breast reaches an internal temperature of 165 degrees F.
  • Serve the chicken with your favorite summer side dish. It's great with rice and over salads. Alternatively this recipe can be made using your favorite method for cooking chicken breast, just remember to cook until the the thickest part of the breast reaches an internal temperature of 165 degrees F.
  • Lemon Basil Grilled Chicken Breasts - Simple, Delicious Summery Marinade Recipe for Chicken. Broil, Bake, Grill or Sauté.

Other Great Recipe Ideas

Simply Recipes – Grilled Cornish Game Hens

The Pioneer Woman – Grilled Chicken Sandwich with Apricot Sauce

Marilyn Monroe Broiled Steak & Artichoke Carrot Salad

$
0
0
Marilyn Monroe Broiled Steak & Artichoke Carrot Salad - Celebrate Marilyn with a meal she would have loved, with recipes featuring some of her very favorite foods.

Marilyn Monroe Broiled Steak & Artichoke Carrot Salad - Celebrate Marilyn with a meal she would have loved, with recipes featuring some of her very favorite foods.

Marilyn Monroe Broiled Steak & Artichoke Carrot Salad – Celebrate Marilyn with a meal she would have loved, with recipes featuring some of her very favorite foods.

Marilyn Monroe, born Norma Jeane Mortenson on June 1, 1926, will always be synonymous with bombshell. A platinum blonde, stunningly beautiful actress, her star may be the brightest Hollywood has ever seen. While Marilyn is more often celebrated for her stunning looks, she was also a very talented actress who took her craft quite seriously. She had an undeniable spark, a star quality that continues to captivate audiences today. As a food writer who is fascinated by Hollywood history, I wondered– what kinds of foods fueled this legendary talent?

When dishing about Marilyn and cooking, inevitably the conversation will lead to curves. Marilyn had curves in all the right places, and her fans were desperate to know how they might achieve a similar figure. In a 1952 article with now out-of-print Pageant magazine, Marilyn claims that she never considered her figure to be exceptional, but that she maintained it through a simple exercise routine and a high protein diet.

Marilyn Monroe Broiled Steak & Artichoke Carrot Salad - Celebrate Marilyn with a meal she would have loved, with recipes featuring some of her very favorite foods.


Pageant Magazine, 1952

“BREAKFAST. I’ve been told that my eating habits are absolutely bizarre, but I don’t think so. Before I take my morning shower, I start warming a cup of milk on the hot plate I keep in my hotel room. When it’s hot, I break two raw eggs into the milk, whip them up with a fork, and drink them while I’m dressing. I supplement this with a multi-vitamin pill, and I doubt if any doctor could recommend a more nourishing breakfast for a working girl in a hurry.

DINNER. My dinners at home are startlingly simple. Every night I stop at the market near my hotel and pick up a steak, lamb chops or some liver, which I broil in the electric oven in my room. I usually eat four or five raw carrots with my meat, and that is all. I must be part rabbit; I never get bored with raw carrots.

P.S. It’s a good thing, I suppose, that I eat simply during the day, for in recent months I have developed the habit of stopping off at Wil Wright’s ice cream parlor for a hot fudge sundae on my way home from my evening drama classes. I’m sure that I couldn’t allow myself this indulgence were it not that my normal diet is composed almost totally of protein foods.”

Marilyn Monroe Broiled Steak & Artichoke Carrot Salad - Celebrate Marilyn with a meal she would have loved, with recipes featuring some of her very favorite foods.

High protein diets hardly seem bizarre by today’s standards, but at a time when most meals were accompanied by a starchy side dish, her style of eating must have seemed a bit strange. I’m tickled by that image of young Marilyn, a busy actress in her hotel room, preparing steak for one in an electric stove.

It’s difficult to know if Marilyn had much talent in the kitchen. Based on what appears to be her only surviving recipe- a handwritten, complicated concoction for stuffing- some speculate that she may have been a domestic goddess. The recipe is a lengthy one made with sourdough bread, assorted meats, nuts and herbs – not one to be taken lightly by an occasional cook. I’ve made it myself, and… well, let’s just say after a very lengthy preparation, I wasn’t entirely enamored with the end result. It does seem that Marilyn enjoyed the challenge of making recipes from scratch. Laren Stover’s Bombshell Manual of Style (2001) includes an interview with Cosmopolitan magazine in which Marilyn shares a story about preparing homemade noodles for her dinner guests without knowing how long they would take to dry:

“The guests arrived; I gave them a drink; I said, ‘You have to wait for dinner until the noodles dry. Then we’ll eat.’ I had to give them another drink. In desperation, I went and got my little portable hairdryer and turned it on. It blew the noodles off the counter, and I had to gather them up and try again.”

In 2008 several of Marilyn’s 1962 grocery store and meat market receipts surfaced, revealing even further insight into her daily diet. The documents support the diet she described in her interview with Pageant – lots of protein, vegetables, milk and only one small treat. Among the list of items were lamb chops, steak, chicken, milk, cheddar cheese, eggs, English muffins, strawberry jam, cucumber, endive, radishes, corn on the cob and artichokes.

Marilyn Monroe Broiled Steak & Artichoke Carrot Salad - Celebrate Marilyn with a meal she would have loved, with recipes featuring some of her very favorite foods.

Marilyn Monroe, Artichoke Queen – February 20, 1948. Source: Castroville Artichoke Festival

Speaking of artichokes, in the very early days of her career, Marilyn was honored with an award that many are not be aware of – Artichoke Queen. The city of Castroville, California is known as the “Artichoke Capital of the World” and hosts an annual artichoke festival. On February 28, 1948, artichoke farmers Edward Modena, Enrico Bellone and Randy Barsotti spotted young Marilyn Monroe in the Castroville area endorsing diamonds at a local jewelry shop. They asked her to tour an artichoke farm, fed her a lunch of freshly cooked artichoke hearts, and honored her with a sash that declared her to be “Queen of the Artichokes.” Judging by her grocery receipts, Marilyn was quite happy with her new title– she did seem to enjoy eating them.

In honor of Marilyn’s birthday, I decided to create a meal she surely would have loved. I’ve broiled a beautiful ribeye steak in honor of her hotel-prepared, high-protein dinners. I’ve served it alongside a simple, delicious salad of artichokes (naturally), raw carrot shreds and endive. It’s a meal fit for a starlet. I only wish I could have served it to Marilyn myself!

Recommended Products:

Cast Iron Skillet

Affiliate links help to support my website and the free recipe content I provide. A percentage of any purchase you make via these links will go towards buying ingredients, photography supplies and server space, as well as all the other expenses involved in running a large cooking website. Thank you very much for browsing!

Marilyn Monroe Broiled Steak & Artichoke Carrot Salad - Celebrate Marilyn with a meal she would have loved, with recipes featuring some of her very favorite foods.

Broiled Steak and Artichoke Carrot Salad

Ingredients

  • 1 cup (6 oz.) artichoke hearts, frozen or canned
  • 2 tbsp olive oil divided, plus more for the steak
  • 1 large carrot (3 oz.), peeled
  • 1 head endive, sliced into strips
  • 1 tbsp chopped fennel fronds or fresh dill
  • 1 tbsp fresh lemon juice
  • 1 tsp honey
  • Salt and pepper to taste
  • 1 lb. ribeye steak, 1 1/2 inch thick

You will also need

  • 10-inch seasoned cast iron skillet or nonstick skillet with oven-safe handle, tongs
Total Time: 35 Minutes
Servings: 2
Kosher Key: Meat
  • Set your steak out and let it come to room temperature before cooking. Set your oven rack 6-12 inches below the broiler. Place your cast iron skillet on the rack and preheat the broiler for 10-15 minutes, leaving the cast iron skillet on the rack so it will heat up with the broiler. The skillet will get quite hot, so be sure you have very thick heat-resistant oven mitts on hand.
  • Marilyn Monroe Broiled Steak & Artichoke Carrot Salad - Celebrate Marilyn with a meal she would have loved, with recipes featuring some of her very favorite foods.
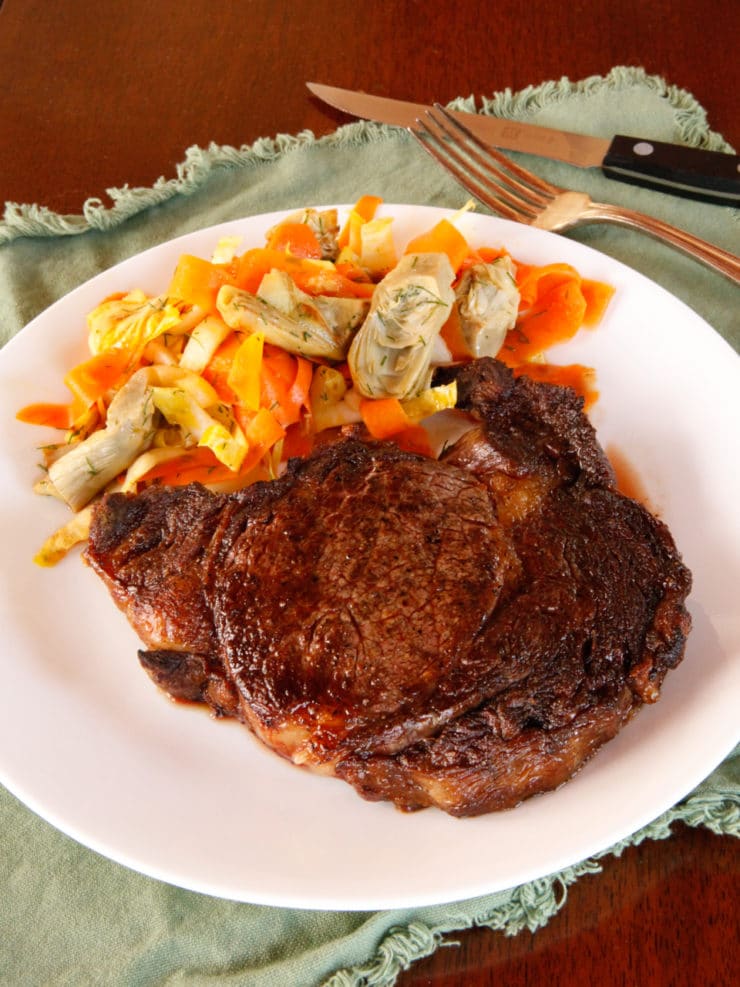
While oven heats up, place a skillet on the stovetop and heat up 1 tbsp olive oil over medium high heat until hot. Add the artichoke hearts (either frozen or thawed) and cook them until warmed through and golden brown around the edges.
  • Marilyn Monroe Broiled Steak & Artichoke Carrot Salad - Celebrate Marilyn with a meal she would have loved, with recipes featuring some of her very favorite foods.Pour artichoke hearts into a bowl and allow to cool to room temperature.
  • Marilyn Monroe Broiled Steak & Artichoke Carrot Salad - Celebrate Marilyn with a meal she would have loved, with recipes featuring some of her very favorite foods.Use a non-serrated peeler to slice the carrot into long ribbons or strips. Set aside with the other salad ingredients.
  • Marilyn Monroe Broiled Steak & Artichoke Carrot Salad - Celebrate Marilyn with a meal she would have loved, with recipes featuring some of her very favorite foods.Rub the steak on both sides with olive oil, then season generously with salt and pepper.
  • Marilyn Monroe Broiled Steak & Artichoke Carrot Salad - Celebrate Marilyn with a meal she would have loved, with recipes featuring some of her very favorite foods.
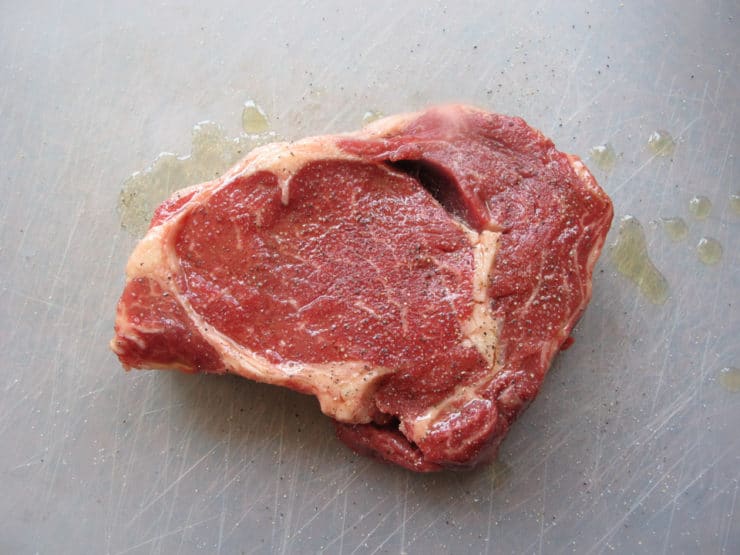
Use oven mitts to pull out the oven rack and place the steak carefully into the preheated skillet. Note that the oil with splatter a bit, as the skillet will be quite hot, and your kitchen will get quite smoky. Return skillet below the broiler and close the oven. Let the steak broil for 2-3 minutes, until top is well browned. Use tongs to flip the steak and continue broiling for another 2-3 minutes longer.
  • Marilyn Monroe Broiled Steak & Artichoke Carrot Salad - Celebrate Marilyn with a meal she would have loved, with recipes featuring some of her very favorite foods.Turn off the broiler and turn oven heat to 500 degrees F. Let the steak continue to cook in the closed oven for 2-3 minutes (rare), 5 minutes (medium) or 7 minutes (medium well). Remove steak from the oven and let it rest for 5 minutes.
  • While steak sits, combine the artichoke hearts, carrot ribbons, endive, and fennel or dill in a medium salad bowl. Stir together 1 tbsp olive oil, 1 tbsp lemon juice, and 1 tsp honey. Pour it over the salad ingredients and toss until well combined. Season the salad with salt to taste. Serve steak with salad. One large 1 lb ribeye should feed two average adult appetites, but you can certainly add another steak to the skillet to make larger portions if you like.
  • Marilyn Monroe Broiled Steak & Artichoke Carrot Salad - Celebrate Marilyn with a meal she would have loved, with recipes featuring some of her very favorite foods.

Research Sources:

Lee, Matt, and Ted Lee. “Marilyn Monroe’s Stuffing Recipe Stars in a Remake.” The New York Times. The New York Times, 09 Nov. 2010. Web. 01 June 2015.

Monroe, Marilyn. “How I Stay In Shape.” Pageant Sept. 1952: 120-26. Web. 22 May 2015.

“Marilyn Monroe.” Marilyn Monroe. Golden Globe Awards, n.d. Web. 22 May 2015.

Monroe, Marilyn. My Story. New York: Cooper Square, 2000. Print.

“Secrets of Marilyn Monroe’s Hourglass Figure Revealed in Receipts.” The Telegraph. Telegraph Media Group, 12 Dec. 2008. Web. 01 June 2015.

Spoto, Donald. Marilyn Monroe: The Biography. New York: HarperCollins, 1993. Print.

Stein, Sadie. “Marilyn Monroe’s Daily Diet.” Jezebel. N.p., 11 Oct. 2010. Web. 01 June 2015.

Taraborrelli, J. Randy. The Secret Life of Marilyn Monroe. New York: Grand Central Pub., 2009. Print.

Farah’s Roast Chicken

$
0
0
Farah's Roast Chicken with Garlic, Honey, Lemon and Chili Flakes - Juicy, Flavorful Roasted Chicken Recipe

Farah's Roast Chicken with Garlic, Honey, Lemon and Chili Flakes - Juicy, Flavorful Roasted Chicken Recipe

Farah’s Roast Chicken with Garlic, Honey, Lemon and Chili Flakes – Juicy, Flavorful Roasted Chicken Recipe

This recipe, Farah’s Roast Chicken, is an oldie but a goodie. It’s one of the very first recipes that I posted on my website, and it’s been a part of my family’s regular meal rotation for several years. I rephotographed it this week and I’m resharing it for the Rosh Hashanah holiday, as I think it would be a nice, simple and affordable entree option. The flavor is very special.

This recipe was taught to me by our Persian Jewish friend Farah, though she stressed that it’s not a Persian dish. She learned this simple roasting method when she was living in Israel many years ago. For larger parties I sometimes double the recipe and roast two chickens; place them side-by-side on a platter and garnish for a lovely presentation. This chicken will make your kitchen smell amazing, especially if you roast a whole head of garlic with it.

Please note that the garlic and chili flakes in the olive oil mixture may burn a bit when exposed to hot spots in the oven. Best to cook it in the center of the oven and keep it covered until the very end, when you’ll uncover to brown the skin; foil is your best bet at keeping those little garlic and chili pieces from burning. Never fear if a few bits burn, it will still taste wonderful. Enjoy!

Recommended Products:

Citrus Juicer

Roasting Pan

Affiliate links help to support my website and the free recipe content I provide. A percentage of any purchase you make via these links will go towards buying ingredients, photography supplies and server space, as well as all the other expenses involved in running a large cooking website. Thank you very much for browsing!

Farah's Roast Chicken with Garlic, Honey, Lemon and Chili Flakes - Juicy, Flavorful Roasted Chicken Recipe

Farah's Roast Chicken

Ingredients

  • 1 whole chicken, 4-5 pounds, split down the back
  • 1/4 cup olive oil
  • 2 tsp yellow mustard
  • 2 tsp honey
  • 1 tsp crushed garlic
  • 1 tsp dried rosemary, crushed in hand to release flavor
  • 1/2 tsp crushed red pepper flakes
  • 1 medium lemon
  • 1/4 tsp lemon zest (from the peel of the lemon)
  • 6 raw garlic cloves
  • Salt and pepper
  • 1 whole head of garlic (optional)
  • Fresh parsley and lemon wedges for garnish

You will also need

  • Roasting pan, foil or parchment
Total Time: 120 Minutes
Servings: 5-6 servings
Kosher Key: Meat
  • * Gluten Free Note: If preparing gluten free, make sure you use a GF certified mustard
  • Preheat oven to 375 degrees F, place a rack in the center of your oven and lightly grease your roasting pan. Whisk together olive oil, mustard, honey, crushed garlic, rosemary and red pepper flakes in a bowl. Rinse and dry the lemon; zest ¼ tsp of lemon peel into the olive oil mixture. Cut the lemon in half and juice it, add the lemon juice to the olive oil mixture. Reserve lemon. Use a fork to stir olive oil mixture until well combined.
  • Farah's Roast Chicken with Garlic, Honey, Lemon and Chili Flakes - Juicy, Flavorful Roasted Chicken RecipeRinse chicken, pat dry. Place chicken breast side up in a roasting pan. Turn drumsticks so that the end tips are facing outward and tuck wings behind the chicken. Tuck the juiced lemon halves and the 6 whole garlic cloves underneath the chicken below the breast, so they will release their aroma into the chicken as it cooks. Season chicken with salt and pepper, then brush the olive oil mixture liberally all over the exposed parts of the chicken. Be sure to use all of the olive oil mixture.
  • Farah's Roast Chicken with Garlic, Honey, Lemon and Chili Flakes - Juicy, Flavorful Roasted Chicken RecipeIf you’d like to roast a head of garlic with the chicken, slice the top of the garlic head off to reveal the cloves and place it root side down in the roasting pan. This roast garlic will turn out tender, savory and aromatic, perfect for spreading on crackers or toasted bread slices.
  • Farah's Roast Chicken with Garlic, Honey, Lemon and Chili Flakes - Juicy, Flavorful Roasted Chicken RecipeCover roasting pan with foil and pierce the outer edges of the foil a few times. Alternatively you may cover it with parchment paper, but foil offers the best protection for those little bits of garlic and the chili flakes, which have a tendency to burn. Place the covered roasting dish in the oven on the center rack and roast for 80-100 minutes, depending on the size of your chicken. Rotate the roasting dish 180 degrees once during cooking to ensure even heat distribution. Chicken is done when internal temperature reaches 170 degrees F as measured by a food thermometer. Remove foil or parchment for the last 20 minutes of cooking to make the skin brown and crispy. Serve on a platter garnished with fresh parsley and lemon wedges.
  • Farah's Roast Chicken with Garlic, Honey, Lemon and Chili Flakes - Juicy, Flavorful Roasted Chicken Recipe

Corky’s Oven Barbecued Short Ribs

$
0
0
Corky's Oven Barbecued Short Ribs - Flanken-Cut Beef Ribs Dry-Rubbed with a Spicy Seasoning Blend, Slow Roasted with Sauce to Tender-Crisp Perfection

Corky's Oven Barbecued Short Ribs - Flanken-Cut Beef Ribs Dry-Rubbed with a Spicy Seasoning Blend, Slow Roasted with Sauce to Tender-Crisp Perfection

Corky’s Oven Barbecued Short Ribs – Flanken-Cut Beef Ribs Dry-Rubbed with a Spicy Seasoning Blend, Slow Roasted with Sauce to Tender-Crisp Perfection

As some of you may have heard, I recently embarked on a new business venture as a partner in an entertainment company called WonderFish Media. It’s an exciting new step and I’ve met some really fun, inspiring people along the way. Recently I hosted a dinner party to celebrate the new business. One of our partners, Hal “Corky” Kessler, was excited to make his famous oven barbecued short ribs for the occasion. He even brought his own dry rub all the way from Chicago. The ribs were a huge hit, and I knew I had to share them with all of you. They have a serious kick… you’ve been warned!

Corky's Oven Barbecued Short Ribs - Flanken-Cut Beef Ribs Dry-Rubbed with a Spicy Seasoning Blend, Slow Roasted with Sauce to Tender-Crisp Perfection

Corky’s “famous spice rub” uses a blend of 3-4 different rubs in equal amounts – he likes a mix of Kirkland Sweet Mesquite Seasoning, Rudy’s Turku Rub, Kozlik’s Meat Rub, and another brand that is coincidentally called Corky’s. Unfortunately these rubs are not widely available in my area, so I had to make do with finding their ingredients online and trying to replicate them on my own. The custom blend below is my crack at capturing Corky’s delectable rib flavor from scratch.

IMG_0243

Short ribs are cut two different ways. Flanken ribs are cut across the bone so that each piece contains 3-4 small pieces of bone between the areas of meat. If you’ve ever cooked or eaten Korean food, you may be familiar with this style of ribs. The short ribs most of us are familiar with, known as English Cut, are cut between the bone, leaving you with one approximately 4 inch long, thick piece of meat attached to one piece of bone. Corky insists on a flanken cut for these ribs; I think it helps keep the meat inside juicy. They can be found at kosher markets or in the meat department of most nicer grocery stores, though it’s likely you’ll have to ask the butcher to cut them for you. Korean grocers also stock them. Just make sure you ask the butcher to slice them 1 inch thick. Enjoy!

Recommended Products:

Basting Brush

Sheet Tray

Affiliate links help to support my website and the free recipe content I provide. A percentage of any purchase you make via these links will go towards buying ingredients, photography supplies and server space, as well as all the other expenses involved in running a large cooking website. Thank you very much for browsing!

Corky's Oven Barbecued Short Ribs - Flanken-Cut Beef Ribs Dry-Rubbed with a Spicy Seasoning Blend, Slow Roasted with Sauce to Tender-Crisp Perfection

Corky's Oven Barbecue Flanken Ribs

Dry Rub Ingredients

  • 3 3/4 tsp mustard powder
  • 1 tbsp brown sugar
  • 2 1/4 tsp smoked paprika
  • 2 1/4 tsp cumin
  • 1 1/2 tsp garlic powder
  • 1 1/2 tsp onion powder
  • 1 1/2 tsp dried thyme
  • 1 1/2 tsp crushed red pepper
  • 1 1/2 tsp celery salt
  • 1 1/2 tsp marjoram
  • 1 1/2 tsp dried oregano
  • 3/4 tsp black pepper
  • 3/4 tsp chili powder (mild)
  • 3/4 tsp dried sage
  • 3/4 tsp sour salt (or citric acid)
  • 3/4 tsp kosher salt
  • 1/2 tsp ground coriander
  • 1/4 tsp heaping allspice
  • NOTE: Instead of the custom spice blend listed here, Corky simply uses a blend of 3-4 barbecue spice rubs. His favorites are Kirkland Sweet Mesquite Seasoning, Rudy's Turku Rub, Corky's Rub and Kozlik's Meat Rub

Ingredients

  • 8 pieces bone-in flanken ribs cut 1 inch thick (should have 4 bones to each piece)
  • 3/4 cup sweet barbecue sauce
  • 3/4 cup spicy barbecue sauce
  • 1 tbsp dry rub mixture

You will also need

  • Baking sheet tray, aluminum foil (or nonstick cooking spray), basting brush, tongs
  • GLUTEN FREE NOTE: If making gluten free, use the from-scratch spice blend and make sure all of your products are certified GF.
Prep Time: 15 Minutes
Cook Time: 3 Hours
Total Time: 3 Hours 15 Minutes
Servings: 8
Kosher Key: Meat
  • Preheat oven to 275 degrees F. In a small bowl, mix together all of the dry rub ingredients until well incorporated. Set aside 1 tbsp of rub for later.
  • Cover a sheet tray with aluminum foil or a generous amount of nonstick cooking spray and place the ribs, evenly spaced, on the tray. Coat one side of the ribs with half of the dry rub mixture, then turn and coat the other side. Place the ribs in the oven for 1 hour.
  • After one hour has passed, remove the ribs from the oven and use tongs to flip them over. Place back in the oven for 1 hour, or until nicely browned.
  • After the second hour has passed, remove the ribs from the oven and turn the oven temperature up to 475 degrees F.
  • While the oven heats up, mix the two barbecue sauces and 1 tbsp of dry mix in a mixing bowl until thoroughly combined.
  • Generously coat each side of the ribs with the barbecue sauce mixture using a basting brush.
  • Once the oven has reached 475 degrees F, place the ribs back into the oven for 30 minutes, then remove and flip them over with tongs. Place them back into the over for another 30 minutes, or until the outside is crisp and the bones seem to pull apart from the meat. Check every 10 minutes or so to make sure they don't burn. When done, they should be crisp on the outside and meltingly tender on the inside. Slice and serve!
  • Corky's Oven Barbecued Short Ribs - Flanken-Cut Beef Ribs Dry-Rubbed with a Spicy Seasoning Blend, Slow Roasted with Sauce to Tender-Crisp Perfection

Savory Grass Fed Pot Roast

$
0
0
Savory Grass Fed Pot Roast - Easy, Flavorful Recipe for Grass Fed Pot Roast with Turmeric, Onions, Mustard, Garlic & Spices

Savory Grass Fed Pot Roast - Easy, Flavorful Recipe for Grass Fed Pot Roast with Turmeric, Onions, Mustard, Garlic & Spices

Savory Grass Fed Pot Roast – Easy, Flavorful Recipe for Grass Fed Pot Roast with Turmeric, Onions, Mustard, Garlic & Spices

As a Southern California resident, lately I’ve been wondering if fall will ever arrive—the weather has been so warm and dry, it’s felt like a never-ending summer. This morning, finally, we awoke to the grey drizzly chill that always accompanies my favorite season. Now that the weather is starting to turn, it seems the perfect time to share one of my go-to pot roast recipes. As our family has become more health conscious through the years, I’ve replaced all standard meat with organic grass fed. Grass fed meat is leaner and lower in cholesterol, while organic meat is hormone and antibiotic free, and fed from chemical-free sources. It took some time to figure out the right way to cook grass fed meat; it’s much leaner than standard beef, and because of this it can take quite a while for stews, roasts and briskets to become tender. I’ve learned that the most important key with these types of dishes is patience– low and slow (a low temp and slow, prolonged cooking) will produce a tender, delicious result.

Savory Grass Fed Pot Roast - Easy, Flavorful Recipe for Grass Fed Pot Roast with Turmeric, Onions, Mustard, Garlic & Spices

This Savory Grass Fed Pot Roast is my favorite way to prepare an organic, grass fed roast. It contains anti-inflammatory turmeric (my favorite spice at the moment), mustard, and a few other Middle Eastern spices to add depth of flavor. I usually throw in green beans as well as the classic potatoes and carrots. It’s a fairly flexible recipe, feel free to throw in the vegetables you have on hand– any sort of large diced or baby potatoes, heirloom carrots, and most other wintry root vegetables will work. You can even add sweet potatoes for a flavor twist.

Of course, you may use a non-grass fed meat if you prefer. It will likely take less time to cook, so check it periodically and remove when fork-tender. I do highly recommend grass fed meat if you can swing it. Enjoy!

Recommended Products:

Dutch Oven

Affiliate links help to support my website and the free recipe content I provide. A percentage of any purchase you make via these links will go towards buying ingredients, photography supplies and server space, as well as all the other expenses involved in running a large cooking website. Thank you very much for browsing!

 Beauty shots and styling by Bethany Nauert.

Savory Grass Fed Pot Roast - Easy, Flavorful Recipe for Grass Fed Pot Roast with Turmeric, Onions, Mustard, Garlic & Spices

Savory Grass Fed Pot Roast

Ingredients

  • 4-5 lb grass fed beef pot roast
  • 2 1/2 tsp kosher salt, divided
  • 1/4 cup olive or grapeseed oil
  • 2 cups beef broth
  • 1 1/2 tsp mustard
  • 2 tsp turmeric
  • 1 tsp cumin
  • Generous pinch cayenne
  • 3/4 tsp black pepper
  • 1 1/2 tbsp potato starch
  • 1 1/2 tbsp cold water
  • 3 bay leaves
  • 6 garlic cloves
  • 1 onion, sliced
  • 12 oz green beans, trimmed
  • 1 lb baby potatoes
  • 3 large carrots

You will also need

  • Dutch oven or large pot with lid
Total Time: 4 Hours
Servings:
Kosher Key: Meat
  • Preheat oven to 300 degrees F. Salt the roast with 1 tsp of kosher salt. In a dutch oven or large pot with a lid, heat the oil and brown the roast on all sides.
  • Remove meat and drain any excess fat. Add 2 cups beef broth and bring to a simmer. Deglaze and scrape up any brown bits. Whisk in the mustard, turmeric, cumin, cayenne, black pepper and remaining 1 1/2 tsp kosher salt.
  • Dissolve the potato starch in the cold water. Whisk slowly into the broth. Starch may clump a bit at first, continue whisking until the sauce thickens.
  • Add bay leaves and garlic cloves to the liquid, then add meat back to the pot.
  • Cover the meat with onion slices. Cover the pot tightly. Place in the oven and let roast for 2 hours.
  • Meanwhile, clean and trim the green beans, scrub the baby potatoes clean and scrub the carrots, then cut them into 1 inch pieces (no need to peel).
  • After 2 hours, take out the pot roast and flip over the meat. Add the vegetables around the meat, covering with the sauce as best you can. Cover again and continue to cook for an additional 60-90 minutes or until the meat is fork tender and the vegetables are tender.
  • Savory Grass Fed Pot Roast - Easy, Flavorful Recipe for Grass Fed Pot Roast with Turmeric, Onions, Mustard, Garlic & Spices

Other Great Recipe Ideas

Simply Recipes – Spring Lamb Stew

Cooking on the Weekends – Cuban Style Chicken Stew


Cholent

$
0
0
Cholent - Slow-cooked stew for Shabbat, also known as Chamin, Dafina, and Skhina. Easy Delicious Recipe on ToriAvey.com

Cholent - Slow-cooked stew for Shabbat, also known as Chamin, Dafina, and Skhina. Easy Delicious Recipe on ToriAvey.com

Schalet is the food of heaven,
Which the Lord Himself taught Moses
How to cook, when on that visit
To the summit of Mount Sinai…

Schalet is the pure ambrosia
That the food of heaven composes—
Is the bread of Paradise;
And compared with food so glorious…

From the poem Princess Sabbath by Heinrich Heine,
translated by Edgar Alfred Bowring

Since Biblical times the Jewish people have scattered and settled all over the globe, adapting their foods to suit the regions where they’ve settled. Over the centuries countless regional ethnic dishes have been made kosher to fit the Jewish religious standards for pure eating. This means that “Jewish food” is really world cuisine; there are very few dishes that are uniquely Jewish. Bagels? A Polish baked bread originally created for Lent and later embraced by the Jews. Gefilte fish? A German dish adopted by Yiddish cooks. But cholent– well, cholent is one of the few foods that is totally and completely Jewish.

In Joan Nathan’s fabulous book Jewish Cooking in America, she writes about this distinction:

“Throughout their wandering history, Jews have adapted their life-styles to the local culture. Food is no exception. Following the same dietary laws, Jews, relying on local ingredients, developed regional flavors. Because they have lived in so many places, there is no ‘Jewish food’ other than matzah; haroset (the Passover spread); or cholent or chamim (the Sabbath stews that surface in different forms in every land where Jews have lived).”

Cholent is uniquely Jewish. It was created because Jewish law does not permit cooking on Shabbat. To adhere to this prohibition, Jewish cooks began to create meat and bean stews in heavy pots that would slowly simmer inside a low-heat oven overnight. They would prepare the stew on Friday before sundown, cook it partially, and place it into the oven to continue cooking throughout the night. That way, there would be no need to kindle a fire or light a stove during the hours of Shabbat; they would simple remove the stew from the oven at mealtime and it would be fully cooked and ready to serve.

Cholent - Slow-cooked stew for Shabbat, also known as Chamin, Dafina, and Skhina. Easy Delicious Recipe on ToriAvey.com

Cholent is partially cooked before the Shabbat candle lighting at sundown on Friday evening, then placed in the oven to slowly finish cooking overnight.

iStock.com/Syversen

According the The New Jewish Holiday Cookbook by Gloria Kaufer Greene, the word cholent may have come into usage in medieval Europe:

“The medieval word cholent (with ‘ch’ pronounced as in ‘chair’) may have come from the French chaud-lent, meaning ‘warm slowly,’ or, less likely, from the Yiddish shul ende which describes when the cholent is eaten — at ‘synagogue end.'”

My friend, food historian Gil Marks, refutes this notion of shul ende being the root of the word, because the word cholent was used in France before Yiddish developed as a language in the mid 1200’s. In his Encyclopedia of Jewish Food, he contends that the word most likely evolved from the French chaud (hot) or from the Spanish escallento (warm), since the dish probably made its way to France from Spain. Still others believe that the word cholent is derived from the Hebrew she’lan, meaning “that rested” and referring to the pot resting in the oven overnight.

While nobody knows the exact source of the word cholent, it is without a doubt one of the most beloved dishes in Jewish cuisine.

A Cholent By Any Other Name

Shabbat stews are cooked all over the world in different ways and under many different names. Here are a few of the many varieties of cholent:

Schalet – The Yiddish word for cholent, referred to in the German poem at the beginning of this blog. Schalet refers to an Eastern European-style cholent with meat, beans, barley, and sometimes kishke. Spicing is minimal; often only salt and pepper are used.

Hamin/Hamim/Chamim/Chamin – From the Hebrew word “hot.” The Sephardic version of cholent is known as hamin. Popular throughout Israel, hamin is often made with chicken rather than meat and usually contains eggs. It is also spiced more exotically than Eastern European cholent.

Dafina & Skhina – In Spain, the Maghreb, and Morocco, cholent is referred to as dafina or skhina. It is generally cooked with chickpeas, meat, potatoes and eggs along with spices native to the Maghreb.

Osh Savo – A sweet and sour Shabbat rice stew served by Bukharan Jews.

Tabeet & Pacha – Iraqi Jews have two popular Shabbat dishes. Tabeet is made with a whole chicken stuffed with rice, herbs, and seasonings. Pacha is tripe stuffed with lamb, seasonings, and rose petals. Both are slowly cooked overnight for Shabbat, which makes them regional ethnic variations on the cholent theme.

Batia Restaurant in Tel Aviv

Cholent - Slow-cooked stew for Shabbat, also known as Chamin, Dafina, and Skhina. Easy Delicious Recipe on ToriAvey.com

With Miri, the manager of Batia restaurant in Tel Aviv.

On a trip to Israel in the summer of 2010, our friend Hagai brought me to a restaurant called Batia in Tel Aviv. It’s a traditional Ashkenazi restaurant, well known for their cholent. While there I met the manager, Miri. She gave me a tour of their kitchen and I got to snap a shot of their massive cholent pot, which is the size of about twelve normal cholent pots. Check it out:

Cholent - Slow-cooked stew for Shabbat, also known as Chamin, Dafina, and Skhina. Easy Delicious Recipe on ToriAvey.com

Huge cholent pot at Batia Restaurant – Tel Aviv, Israel.

Miri told me that even with all of this cholent, they never fail to run out towards the end of the day. It is absolutely delicious. Their cholent is made in the Israeli style with eggs, similar to mine but with less spices. They also add a kishke to their cholent and sliced meat if you ask for it.

Cholent - Slow-cooked stew for Shabbat, also known as Chamin, Dafina, and Skhina. Easy Delicious Recipe on ToriAvey.com

Batia’s famous cholent, complete with kishke.

Cholent: A Family Affair

Tamar Genger from the website Joy of Kosher talked about the warm memories and feelings that a pot of cholent can conjure. “People have an emotional response to the word ‘cholent’ — it may be a memory of a meal at a grandparents house, kiddush after shul or that unmistakable smell that warms the entire home on a cold winter morning.” I totally relate to this emotional response, even though I didn’t grow up eating cholent. For the past decade, cholent has made a regular appearance on our Shabbat table. During the winter, it doesn’t feel like Shabbat unless a pot of cholent is slowly cooking in the oven, filling the house with its tantalizing, savory aroma. Cholent and challah are the official flavors of Shabbat in our home.

Cholent recipes vary greatly from region to region, and even from family to family. No two cholent recipes are exactly alike. It’s one of those dishes that evolves over generations, with spices and ingredients being added or changed to suit family tastes. Some cholent recipes have a hint of sweetness in them from the addition of honey or ketchup. Our family prefers a savory cholent, the recipe for which appears below. Ashkenazi cholent recipes sometimes include kishke, or stuffed derma, which is a particularly unique Jewish delicacy. We never include a kishke, but you could certainly buy a kishke and add it to the pot. Couldn’t hurt!

Our family’s cholent recipe is a reflection of the heritage of my fiance’s parents; his mother was Sephardic, his father Ashkenazi. The dish uses the basic ingredients of an Ashkenazi cholent– meat, beans, potatoes, and sometimes barley or kasha– with added Sephardic spices for flavor. We also add whole eggs to the pot, another Sephardic custom. The eggs slowly cook in the broth, soaking up the flavor of the cholent and turning a lovely brown color. I sometimes use chickpeas, as is the custom in Moroccan dafina. Other times, I use a combination of kidney, pinto, and lima beans, which are more often used in Ashkenazi cholent. It just depends on what we have in the pantry on Friday. I use red potatoes because they have a lower starch content, so they won’t dissolve during the long slow cooking process. When we want a lighter cholent, I leave out the barley grains and let the potatoes take starchy center stage. Cholent is flexible that way. The result of combining all of these different flavors is an irresistible savory cholent that is always a hit on Shabbat.

Over the years I’ve refined this cholent recipe. I used to overnight soak the beans, pre-boil the ingredients and often cooked it in the oven. Now I always use a slow cooker, and I only give the beans a quick soak. If I’m in a hurry I skip the soak entirely– the quick soaked beans are easier on digestion, but the slow cooking process will fully cook the raw beans. Remember, this dish cooks overnight, which requires some forethought. The traditional way is to start the cooking on Friday before sundown so that the pot cooking before Shabbat begins. Enjoy!

Note – I have updated this recipe from a 2010 post with several refinements and new photos from my talented from Louise Mellor. If you’re looking for the old recipe, scroll down in comments, I have posted it there.

Recommended Products:

Slow Cooker

Affiliate links help to support my website and the free recipe content I provide. A percentage of any purchase you make via these links will go towards buying ingredients, photography supplies and server space, as well as all the other expenses involved in running a large cooking website. Thank you very much for browsing!

Food Photography Beauty Shots & Styling by Louise Mellor

Cholent - Slow-cooked stew for Shabbat, also known as Chamin, Dafina, and Skhina. Easy Delicious Recipe on ToriAvey.com

Cholent

Ingredients

  • 2 1/2 lbs large red potatoes, peeled and halved (for a smaller slow cooker, use 2 lbs)
  • 2 onions, chopped
  • 2 1/2 lbs beef stew meat or brisket, cut into chunks (for a smaller slow cooker, use 2 lbs)
  • 2 marrow bones
  • 1 cup dried beans - lima, pinto, chickpeas, red beans (not kidney), or a mixture
  • 1/2 cup pearl barley or coarse-grain kasha (optional - for gluten free, do not use pearl barley)
  • 3 whole garlic cloves
  • 6 eggs (optional)
  • 1/2 tsp black pepper (if spice sensitive use 1/4 tsp)
  • 1 quart low sodium chicken broth
  • 1 tbsp kosher salt
  • 1 1/2 tsp paprika
  • 1 1/2 tsp turmeric
  • 1 tsp cumin
  • 1/4 tsp cayenne (if spice sensitive use just a pinch)
  • 1 kishke (optional - we never add this, but many families like it)
  • Water (varies)

You will also need

  • 6-8 quart slow cooker
Total Time: 16 Hours
Servings: 8 servings
Kosher Key: Meat
  • Note: The beans in this recipe will soften without any pre-soaking due to the long slow cooking process, however they will be easier to digest with a simple quick soak prior to cooking. To do this, place the beans into the bottom of a large pot and cover with water. The beans will expand to over double their size, so make sure you cover by several inches of water to allow for expansion. Bring the beans to a boil for 5 minutes, then remove from heat. Let them soak in the cooking water for 1 hour, then drain and rinse well before proceeding with the recipe. Also note that it is not recommended to slow-cook kidney beans.
  • In a large slow cooker (the larger the better!), place the potatoes in a single layer on the bottom of the cooking vessel.
  • Cholent - Slow-cooked stew for Shabbat, also known as Chamin, Dafina, and Skhina. Easy Delicious Recipe on ToriAvey.comSprinkle the onions over the potatoes.
  • Cholent - Slow-cooked stew for Shabbat, also known as Chamin, Dafina, and Skhina. Easy Delicious Recipe on ToriAvey.comPlace the beef in a single layer on top of the onions and potatoes. Place the two marrow bones in the meat. If you're adding a kishke, now would be the time to put it in the cooker.
  • Cholent - Slow-cooked stew for Shabbat, also known as Chamin, Dafina, and Skhina. Easy Delicious Recipe on ToriAvey.comRinse the beans clean, checking for any stones or impurities. If using barley or kasha, do the same with the grains. Sprinkle the beans (raw or pre-soaked) and optional grains over the top of the meat. Place the three whole garlic cloves into the meat, evenly spaced. Sprinkle the whole mixture with the black pepper.
  • Cholent - Slow-cooked stew for Shabbat, also known as Chamin, Dafina, and Skhina. Easy Delicious Recipe on ToriAvey.comIf using eggs, rinse them well and then tuck them into the meat. In a 4-cup container, whisk together the low sodium chicken broth, kosher salt, paprika, turmeric, cumin and cayenne.
  • Cholent - Slow-cooked stew for Shabbat, also known as Chamin, Dafina, and Skhina. Easy Delicious Recipe on ToriAvey.comPour the liquid over the cholent. Add additional water until all of the beans and pieces of meat are covered. For us, it's usually another 1-2 cups of water in our slow cooker-- it will vary; I usually add a bit more liquid if using grains, because they will soak it up.
  • Cholent - Slow-cooked stew for Shabbat, also known as Chamin, Dafina, and Skhina. Easy Delicious Recipe on ToriAvey.comCover the slow cooker. Cook on low heat for 16 hours. Check occasionally as it's cooking; add additional water and stir a bit if it's looking too dry. Most cookers will auto-switch to warm when the cooking is complete. If yours doesn’t, set it to warm until ready to serve.
  • Cholent - Slow-cooked stew for Shabbat, also known as Chamin, Dafina, and Skhina. Easy Delicious Recipe on ToriAvey.comIt will look a bit medieval when it's done cooking! Don't worry, just dig in and you'll see that it's perfectly cooked below the surface. Peel the eggs before serving the cholent. 
  • Cholent - Slow-cooked stew for Shabbat, also known as Chamin, Dafina, and Skhina. Easy Delicious Recipe on ToriAvey.comTo cook this recipe in the oven, layer the ingredients in a large heavy 7-8 quart Dutch oven. Make sure you have enough liquid to just cover all ingredients. Cover with lid and cook cholent at 200 degrees for 12-16 hours.
  • Cholent - Slow-cooked stew for Shabbat, also known as Chamin, Dafina, and Skhina. Easy Delicious Recipe on ToriAvey.com

Passover Potato Kugel

$
0
0
Passover Potato Kugel - Traditional Jewish Kugel with Potatoes, Onions and Eggs for the Passover Holiday.

Passover Potato Kugel - Traditional Jewish Kugel with Potatoes, Onions and Eggs for the Passover Holiday.

Kugel is a quintessentially Jewish dish that is best described as a baked pudding. The dish originated over 800 years ago in Germany and quickly became popular with Jewish families throughout Eastern Europe. There are many kinds of kugels—noodle kugelssweet kugels, savory kugels. Slow cooking overnight kugels developed because Orthodox families were not allowed to cook during the hours of Shabbat. During the Passover holiday, noodles and sweets take a back seat to dairy-free and flour-free potato kugels, which are served alongside other holiday classics like brisket, roast chicken and matzo ball soup.

For the past several years I’ve been refining my potato kugel recipe. My goal was to create a kugel with the soul of a latke– one big, fluffy, sliceable latke that can serve a large crowd. I’ve learned, over time, to keep things simple… potatoes, eggs, onions and fat, a little starch, some salt and pepper – that’s all you need to make a great kugel. The rest is all about technique. I used to put matzo meal in my kugel to bind it, but have since switched over to potato starch (the “secret ingredient” I use to make crispy, amazing latkes). The starch makes for a lighter, fluffier texture inside… it’s also gluten free for those who have dietary restrictions. Over time I learned to preheat my baking dish, a technique I picked up from my sister-in-law. This step produces a really brown, beautiful crust on the kugel that simply can’t be obtained by oven cooking alone.

This Passover Potato Kugel is everything a kugel should be… crispy on the outside while soft, fluffy and tender inside. It’s like one enormous latke, an irresistible addition to any Seder table. I highly recommend the schmaltz (rendered chicken fat) if you can swing it. If you prefer to keep it meat-free, use olive oil and it will still be very, very tasty. Enjoy!

Note: I am always working to make my recipes better. I have improved this recipe and reposted it with new pictures. If you’re looking for the old recipe, leave a comment and let me know. I plan to post another”improved” potato kugel recipe with Sephardic spices in the coming weeks. Stay tuned!

Recommended Products:

Food Processor

Cast Iron Baking Dish

Metal Baking Pan

Porcelain Baking Dish

Affiliate links help to support my website and the free recipe content I provide. A percentage of any purchase you make via these links will go towards buying ingredients, photography supplies and server space, as well as all the other expenses involved in running a large cooking website. Thank you very much for browsing!

Passover Potato Kugel - Traditional Jewish Kugel with Potatoes, Onions and Eggs for the Passover Holiday.

Passover Potato Kugel

ingredients

  • 5 lbs russet potatoes (about 10 medium-sized potatoes)
  • 2 large onions
  • 6 eggs
  • 2 tsp salt
  • 1/2 tsp black pepper
  • 6 tbsp potato starch (if not serving for Passover you may substitute corn starch)
  • 1/4 cup schmaltz or extra virgin olive oil, divided (schmaltz gives amazing flavor; use olive oil to keep it vegetarian)

You will also need

  • 9x13 ceramic, metal or cast iron baking dish or pan (I don't recommend using glass), food processor with grating attachment or hand grater, mixing bowls, pastry brush
Prep Time: 20 Minutes
Cook Time: 70 Minutes
Total Time: 90 Minutes
Servings: 15
Kosher Key: Pareve or Meat (depending on fat used), Kosher for Passover
  • Place a 9x13 baking dish or pan in the oven and preheat oven to 400 degrees, letting the dish heat up inside. Peel the potatoes, then use a food processor or hand grater to grate them into large shreds.
  • Passover Potato Kugel - Traditional Jewish Kugel with Potatoes, Onions and Eggs for the Passover Holiday.Place the potato shreds in a large mixing bowl and cover with cold water. Let the shreds sit for a few minutes.
  • Passover Potato Kugel - Traditional Jewish Kugel with Potatoes, Onions and Eggs for the Passover Holiday.Meanwhile, peel and shred the two large onions in the food processor or with a hand grater. Reserve.
  • Passover Potato Kugel - Traditional Jewish Kugel with Potatoes, Onions and Eggs for the Passover Holiday.In a medium mixing bowl, whisk together the eggs, salt and pepper until fluffy.
  • Passover Potato Kugel - Traditional Jewish Kugel with Potatoes, Onions and Eggs for the Passover Holiday.Drain the potato shreds in a colander, pushing down firmly on top of the shreds with your hands to push out the excess liquid.
  • Passover Potato Kugel - Traditional Jewish Kugel with Potatoes, Onions and Eggs for the Passover Holiday.Place grated potatoes in a large bowl. Add the seasoned eggs, grated onions and potato starch to the bowl. Use your hands to mix all ingredients together until well combined.
  • Passover Potato Kugel - Traditional Jewish Kugel with Potatoes, Onions and Eggs for the Passover Holiday.Take the preheated baking dish out of the oven. Quickly pour in 3 tbsp schmaltz or olive oil, then use a pastry brush to carefully spread the fat around the bottom and sides of the hot dish. Careful, don't burn yourself! The hot dish, while a bit difficult to navigate, will help to form a beautiful brown and crisp crust for the kugel.
  • Passover Potato Kugel - Traditional Jewish Kugel with Potatoes, Onions and Eggs for the Passover Holiday.Carefully and quickly spread the potato mixture into an even layer in the baking dish (it should sizzle!), then drizzle remaining 1 tbsp of melted schmaltz or olive oil across the top.
  • Passover Potato Kugel - Traditional Jewish Kugel with Potatoes, Onions and Eggs for the Passover Holiday.Bake uncovered at 400 degrees for 60-70 minutes until the top is nicely browned all across the top. If it seems to be browning too fast (before the center is cooked), cover the kugel to keep it from over-browning. You really want it to have a nice golden crust-- at the end of cooking, if it's not quite brown enough, you can put it 6 inches below the broiler for a minute or two to evenly brown it all across the top. This kugel tastes best served hot directly from the oven. Let it sit for 5-10 minutes before slicing and serving.
  • Passover Potato Kugel - Traditional Jewish Kugel with Potatoes, Onions and Eggs for the Passover Holiday.

Mediterranean Olive Chicken

$
0
0
Mediterranean Olive Chicken - Healthy Roasted Marinated Chicken Recipe on ToriAvey.com

Mediterranean Olive Chicken - Healthy Roasted Marinated Chicken Recipe on ToriAvey.com

Note: I have updated this recipe from my archives with new photographs courtesy of Louise Mellor. This recipe is an oldie but a goodie. Enjoy!

I grew up eating a lot of chicken and a lot of fish. My mom and stepdad stuck to a heart-healthy diet, which meant that we rarely ate red meat. I used to complain about this when I was 6 or 7 years old… in fact, I had a little saying, which I liked to proclaim in sing-song fashion:

Chicken or fish, chicken or fish, all we ever eat is chicken or fish.

My mother, bless her heart, refrained from scolding me. She’d just smile, hand me my plate, and cheerfully announce that I was on dish duty. I quickly learned that I’d better stop complaining and eat up, or I’d be stuck doing dishes until I went to college.

Looking back, I find it funny that I was bummed about the lack of red meat in my childhood diet. Nowadays, I don’t eat much meat at all– in fact, I would say we’re about 80% vegetarian. We eat Mediterranean-style most of the time, which means we enjoy lots of veggies, fruits, whole grains and olive oil, and very little red meat. We prefer vegetarian entrees, but when we do choose to eat meat, it’s usually chicken or fish… more often chicken.

Because of our Mediterranean inclinations, I’m always coming up with new and creative ways to prepare chicken. I developed this recipe back in 2013, and it’s become a regular on our family meal rotation. It started with a container of ripe green olives in the fridge that I’d been wanting to use up. The thought of marinating those salty olives with chicken sounded enticing. I began throwing together all kinds of complimentary flavors– lime juice for a mild tartness, honey for sweetness, garlic and oregano, plus red pepper flakes for a kick. After marinating and roasting, the chicken turned out just lovely… aromatic, herby, juicy and full of flavor. The marinade created delectable olive-laden pan drippings, so I skimmed the fat, added white wine, and whipped up a delicious sauce.  It would make a great weeknight recipe, and it’s even special enough for a holiday meal. Try it and let me know what you think!

Recommended Products:

Mixing Bowls

Ceramic Baking Dish

Sauce Pan

Affiliate links help to support my website and the free recipe content I provide. A percentage of any purchase you make via these links will go towards buying ingredients, photography supplies and server space, as well as all the other expenses involved in running a large cooking website. Thank you very much for browsing!

Food Photography Beauty Shots & Styling by Louise Mellor

Mediterranean Olive Chicken - Healthy Roasted Marinated Chicken Recipe on ToriAvey.com

Mediterranean Olive Chicken

Ingredients

  • 3/4 cup chopped ripe green olives
  • 1/3 cup extra virgin olive oil
  • 2 tbsp fresh lime juice
  • 1 tbsp crushed garlic
  • 2 tsp honey
  • 1/2 tsp lime zest
  • 1/2 tsp red pepper flakes (if sensitive to spice, omit)
  • 1/2 tsp dried oregano
  • Salt and pepper
  • 4-5 lb chicken pieces, bone in, skin on (I like using chicken thighs)
  • 1/4 cup dry white wine
  • 2 tsp cornstarch or potato starch (use potato starch for Passover)

You will also need

  • 9x13 baking dish, plastic wrap, foil
Servings: 6-8
Kosher Key: Meat
  • In a mixing bowl, whisk together the chopped olives, olive oil, lime juice, garlic, honey, lime zest, red pepper flakes and oregano. Season the marinade with salt and pepper to taste.
  • Mediterranean Olive Chicken - Healthy Roasted Marinated Chicken Recipe on ToriAvey.comSprinkle the chicken pieces lightly with salt and pepper. Place chicken pieces in a 9x13 ceramic or glass baking dish. Brush the pieces evenly with olive marinade, using all of the marinade to coat.
  • Mediterranean Olive Chicken - Healthy Roasted Marinated Chicken Recipe on ToriAvey.comCover the baking dish with plastic wrap and place it in the refrigerator for at least 2 hours, up to overnight (overnight is best).
  • Preheat oven to 375 degrees F. Remove the plastic wrap and cover the baking dish with parchment or foil. If using foil, pierce a few vents with a sharp knife around the outer edges. If using parchment, simply cover the dish loosely.
  • Place the covered dish in the oven. Let the chicken bake for 60 minutes, then remove the parchment or foil and cook for an additional 15-30 minutes, basting periodically, until well cooked and tender. At the end of cooking, you may broil it for a minute or two to brown the skin-- watch carefully to make sure it doesn't burn!
  • Mediterranean Olive Chicken - Healthy Roasted Marinated Chicken Recipe on ToriAvey.comTransfer chicken pieces to a platter. Carefully tip the baking dish so that the pan drippings and juices gather in one corner. Use a spoon to skim off the clear liquid fat, separating it from the solid drippings. Discard the fat.
  • Pour the remaining drippings into a small saucepan along with ¼ cup of white wine. Heat the sauce slowly over medium.
  • While sauce is heating, whisk together 1 tbsp cornstarch or 2 tsp potato starch and 2 tbsp water till smooth. Pour the starchy liquid into the saucepan and whisk until combined. Heat the sauce until bubbling and thickened.
  • Serve the chicken topped with warm sauce. Note: this recipe is kosher for Passover if you use potato starch and Passover-approved products with a kosher hechsher.
  • Mediterranean Olive Chicken - Healthy Roasted Marinated Chicken Recipe on ToriAvey.com

Other Great Recipe Ideas

The Pioneer Woman: Herb Roasted Whole Chicken

Tasty Kitchen: Chipotle Grilled Chicken Tacos

Recipe Girl: Cilantro Chicken

Kalyn’s Kitchen: Chicken Souvlaki

Leite’s Culinaria: Peruvian Roast Chicken

Kobete – Sephardic Savory Meat Pie

$
0
0
Kobete - Sephardic Savory Meat Pie on ToriAvey.com

Kobete - Sephardic Savory Meat Pie on ToriAvey.com


On our recent trip to Israel, my husband took a walk on the street where he grew up– Ness Ziona, which translates to Miracle of Zion. It’s a cute little street in Tel Aviv, not far from our hotel on the edge of the Mediterranean sea. As he neared the apartment building where he was born, he was flooded with memories of his mom’s cooking. She was Sephardic, seventh generation Israeli from Haifa, so many recipes my husband grew up with had a distinctly Sephardic influence. None of her home-cooked recipes made him happier than kobete.

Kobete is a meat-filled savory pie, a filling and hearty entree for a cold winter day. Similar kobete meat pies are made in Turkey with seasoned chicken as a filling. My husband’s father lived in Turkey for a short time on his way back to Israel, and the Turkish influence made an impression on their family cuisine. Their family recipe for kobete is different than the standard Turkish version; it features seasoned ground beef, potatoes, tomatoes and pine nuts. It is very tasty. Every winter, without fail, my husband requests it. As soon as we got back from Israel, I knew I had to make it for him.

This is a heavy entree, so best reserved for colder weather. The savory spiced meat, tomato and potato filling is hearty and full of flavor. A flaky, golden, sesame-coated crust bakes around the filling. I think this may very well be my husband’s all-time favorite dish. If he is having a rough week, a warm batch of kobete never fails to cheer him up. It’s cozy comfort food, just right for a chilly evening.

Kobete - Sephardic Savory Meat Pie on ToriAvey.com

Kobete - Sephardic Savory Meat Pie

Ingredients

  • 1 package puff pastry
  • 2 lbs. fresh tomatoes
  • 2 tsp. sugar
  • 3 tbsp. olive oil
  • 1 large onion, diced
  • 2 cloves garlic, minced
  • 1 1/2 lbs. russet potatoes (2 large baking potatoes), peeled and cut into 1-inch pieces
  • 1 lb. ground beef or ground lamb, or a mixture
  • 1 tsp. cumin
  • 1/2 tsp. paprika
  • 1/4 tsp. turmeric
  • Salt and pepper
  • Dash of cayenne
  • 1/3 cup chopped fresh parsley
  • 1/4 cup pine nuts (optional)
  • 1 egg yolk
  • 1 tbsp. sesame seeds

You will also need

  • 9x13 inch glass baking dish, baking sheet, nonstick skillet, large mixing bowl, clean kitchen towel, pastry brush.
Total Time: 2 Hours 30 Minutes
Servings: 12 servings
Kosher Key: Meat
  • Defrost puff pastry. Place a rack in the lower part of the oven and place baking sheet on it. Preheat oven and baking sheet to 425 degrees F.
  • Slice the tomatoes in half horizontally and squeeze them firmly over the sink to remove excess juice. Dice the tomatoes, place them in a colander, and sprinkle them with 2 tsp of sugar and 1 tsp salt. Let them sit while you prepare your other ingredients.
  • Warm 2 tbsp. oil in a large nonstick skillet. Sauté the onion for about 5 minutes until it begins to soften. Add minced garlic and sauté for another minute until aromatic. Mix in the diced potatoes. Cover the pan and let the potatoes cook for 8 minutes, stirring every 2 minutes, until the potatoes start to get tender. If the potatoes begin to stick, add a little water to the skillet and continue stirring to loosen them.
  • Kobete - Sephardic Savory Meat Pie on ToriAvey.comAfter 8 minutes, pour the potatoes and onion mixture into a large mixing bowl and set aside.
  • In the same skillet, add your ground meat, cumin, paprika, cayenne, and salt and pepper to taste (I usually use ¾ tsp of salt and ¼ tsp of pepper). Sauté the meat for a few minutes, breaking apart the meat with a metal spatula, until it is half-cooked—half pink, half browned, and well mixed with the seasonings.
  • Kobete - Sephardic Savory Meat Pie on ToriAvey.comDrain off the excess liquid from the tomatoes in the colander, then gather the tomatoes in a clean kitchen towel, wrapping it up in a bundle. Squeeze the kitchen towel firmly to remove excess moisture from the tomatoes. Reserve.
  • If you’re using pine nuts, toast them for a few minutes in a small skillet.
  • Kobete - Sephardic Savory Meat Pie on ToriAvey.comPour the ground meat into the mixing bowl with the potatoes, then add the chopped parsley, the drained tomatoes and the pine nuts. Stir to blend all ingredients.
  • Kobete - Sephardic Savory Meat Pie on ToriAvey.comRoll out your two puff pastry sheets on a lightly floured surface to rough 11x15 inch rectangles. Lightly grease the baking dish. Gently spread one piece of puff pastry over the bottom of the baking dish.
  • Kobete - Sephardic Savory Meat Pie on ToriAvey.comPour the meat mixture into the puff pastry in an even layer.
  • Kobete - Sephardic Savory Meat Pie on ToriAvey.comLay the second piece of puff pastry over the top of the dish. Trim off the excess dough.
  • Kobete - Sephardic Savory Meat Pie on ToriAvey.comFold the edges over to make a ridge and seal using the tines of a fork.
  • Kobete - Sephardic Savory Meat Pie on ToriAvey.comWhisk together the egg yolk with 2 tsp of water. Brush the top of the pie with a thin layer of the egg yolk.
  • Kobete - Sephardic Savory Meat Pie on ToriAvey.comSprinkle with sesame seeds. Pierce the top of the pie a few times to vent.
  • Kobete - Sephardic Savory Meat Pie on ToriAvey.comPlace the assembled pie onto the preheated baking sheet in the bottom of the oven. Bake the kobete for 30 minutes at 425 degrees F, then reduce heat to 350 degrees F. Continue baking for 30-40 minutes longer until the crust is golden brown and cooked through. Remove from oven and allow pie to cool on a wire rack for 20-30 minutes before slicing. Serve warm.
  • Kobete - Sephardic Savory Meat Pie on ToriAvey.com

Chicken Okra Stew

$
0
0
Simple and tasty stew made with okra, chicken, carrots and North African spices. Delicious one-pot meal.

How to Make Crispy Perfect Latkes Every Time

$
0
0
Latkes on a white plate with sour cream.Learn tips and tricks for making perfect latkes every time that are crispy outside, fluffy inside. Includes links to several tested latke recipes

Stuffed Cabbage Leaves

$
0
0
Stuffed Cabbage Leaves - Delicious Savory Recipe and Video Tutorial | Tori AveyLearn to make savory stuffed cabbage leaves with meat and rice filling and a classic tart and sweet tomato sauce.

West African Brisket

$
0
0
Two slices of West African Brisket on sauce topped with herbs on plate with bowl of sauce, brisket in background.
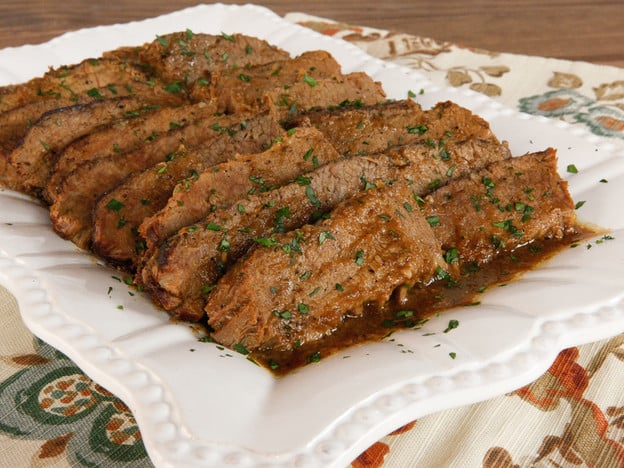
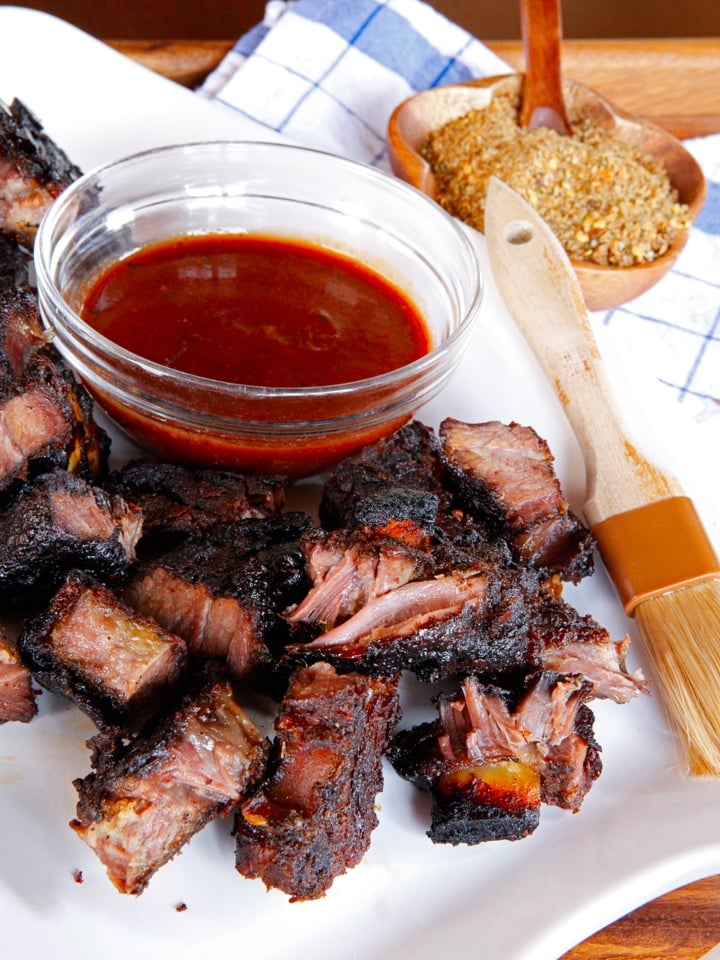
Tender, tasty brisket slowly cooked with African spices, peppers, herbs and garlic. A recipe from Michael Twitty, author of The Cooking Gene.

Spicy Teriyaki Broiled Chicken Thighs

$
0
0
Spicy Teriyaki Broiled Chicken Thighs on white plate topped with scallions, skillet with chicken on blue towel in background with bottle of Soy Vay Veri Veri Teriyaki Marinade.Simple and flavorful chicken thighs marinated in Soy Vay Veri Veri Teriyaki, then baked and broiled for a caramelized, grill-like finish. Oven to table in 25 minutes.

Moroccan Paprika Fish

$
0
0
Moroccan paprika fish on a bed of vegetables topped wth fresh green herbs in a white bowl.Healthy, tasty, and authentic recipe for fish cooked in a mild Moroccan paprika sauce with olive oil, garlic, cilantro, and red bell peppers.

Yemenite-Style Matzo Ball Soup

$
0
0
A classic Jewish chicken soup recipe with a Middle Eastern twist. Golden turmeric-spiced broth with fluffy, flavorful matzo balls. Kosher for Passover.

Smoky Panko Schnitzel Bites

$
0
0
Plate of schnitzel nuggets with red sriracha sauce on wooden table, towel in background.Recipe for bite-sized chicken schnitzel pieces coated in smoky, crispy panko breadcrumbs with sesame, served with warm sweet-and-spicy honey sriracha sauce.
Viewing all 80 articles
Browse latest View live